NOTE/UPDATE: After an update this kind of stopped working and I struggled with it a lot. Now I actually recommend using snapcast instead of this solution. It works better!
I moved to a new place and it has more than one room. Naturally, I hooked up the stereo in the living room and tested it like my dad taught me: by playing “Money For Nothing” really loudly. It worked. But wait a minute, there’s an upstairs now… how will I get it playing up there? I could always use the wifi network and raspberry pis to beam audio around. Yeah, let’s do that!

So first and foremost I have to tell you that this is a fairly linux-centric setup. The Raspberry Pi’s are running Raspbian and I have an Ubuntu home server and my daily-use laptop is also Linux. That said, I can run this whole setup from my android phone, and there are ways to control it with Windows, no doubt.
PulseAudio is the key
PulseAudio is a sound system that’s available on many linux-based machines. It is typically used to pipe audio between applications on a computer. But it natively supports sending audio through a network too, just as we want! So this post is mostly about setting up PulseAudio for a networked sound setup. The official documentation for this is available here.
Setting up the main server
I set up the main PulseAudio server on my home server which is plugged into a hard-wired ethernet cable. Notwithstanding all the warnings about running PulseAudio in system mode, this is the right application for it. So we go into /etc/pulse/system.pa and set a few things besides the defaults:
|
1 2 3 4 5 6 7 8 9 10 11 12 |
### Enable positioned event sounds load-module module-position-event-sounds # Grant unfettered access to anyone on my LAN or VPN subnets load-module module-native-protocol-tcp auth-ip-acl=127.0.0.1;192.168.168.0/24;10.8.0.0/24 load-module module-zeroconf-publish # add the pi as a sink load-module module-tunnel-sink server=192.168.168.177 sink_name=pi # add a sink with all sinks load-module module-combine-sink sink_name=combined slaves=alsa_output.pci-0000_00_1f.3.analog-stereo,pi |
The combined sink at the bottom is for when I want to play the same thing through all the clients at once, as opposed to playing different things through different rooms. By the way, I got the name of that alsa sink at the bottom (which is the sound card of the home server) using the list-sinks PulseAudio command, which required you to run it slightly oddly when in system mode:
|
1 |
sudo PULSE_RUNTIME_PATH=/var/run/pulse -u pulse pacmd list-modules |
Anyway, then, I went ahead and disabled autospawn in client.conf because I wanted to run it at boot. I made pulseaudio.service, put it in /etc/systemd/system and put this in it:
|
1 2 3 4 5 6 7 8 9 10 11 |
[Unit] Description=PulseAudio system-wide server [Service] Type=forking PIDFile=/var/run/pulse/pid ExecStart=/usr/bin/pulseaudio --daemonize --system --realtime --log-target=journal ExecStop=/usr/bin/pulseaudio -k [Install] WantedBy=multi-user.target |
Then activate it with:
|
1 |
sudo systemctl enable <span class="highlight">application</span>.service |
Boom.
Setup on the Pi
Setup is similar on the Pi. We do system mode again but this time we just have to edit the client.conf file and uncomment the default-server line and add in the IP address or hostname of the server and disable autospawn. Then I did the same systemd startup script and activated it. Oh I also messed around with the resample-method in daemon.conf and set it to trivial to minimize the load on the Pi but I don’t think this was necessary.
Troubleshooting
At first things were bad, the audio was really low quality and jumped around like crazy. After hours of trying to synchronize the clocks, I learned that the newer timer-based sampling doesn’t always work on all hardware. So I tried disabling by adding tsched=0 to the udev module lines on the server’s system.pa file:
|
1 2 3 4 5 6 7 |
### Automatically load driver modules depending on the hardware available .ifexists module-udev-detect.so load-module module-udev-detect tsched=0 .else ### Use the static hardware detection module (for systems that lack udev/hal support) load-module module-detect tsched=0 .endif |
I also gave PA access to run in real time by editing /etc/security/limits.conf. Wow, what a difference. Rock solid audio now, always.
I had another problem where libao-based things often had choppy audio over the network-sink. Adjusting the /etc/libao.conf file seemed to help a lot:
|
1 2 3 4 5 |
default_driver=pulse quiet buffer_time=50 dev=combined server=localhost |
Testing the setup
Initial testing was done on the command line by playing mp3’s with mpg321. You just run:
|
1 |
PULSE_SERVER=server mpg321 real\ mccoy\ -\ runaway.mp3 |
Then you have to set the volumes and whatnot. The easiest way to do this is through the GUI program pavucontrol, run on my laptop on the LAN via:
|
1 |
PULSE_SERVER=server pavucontrol |
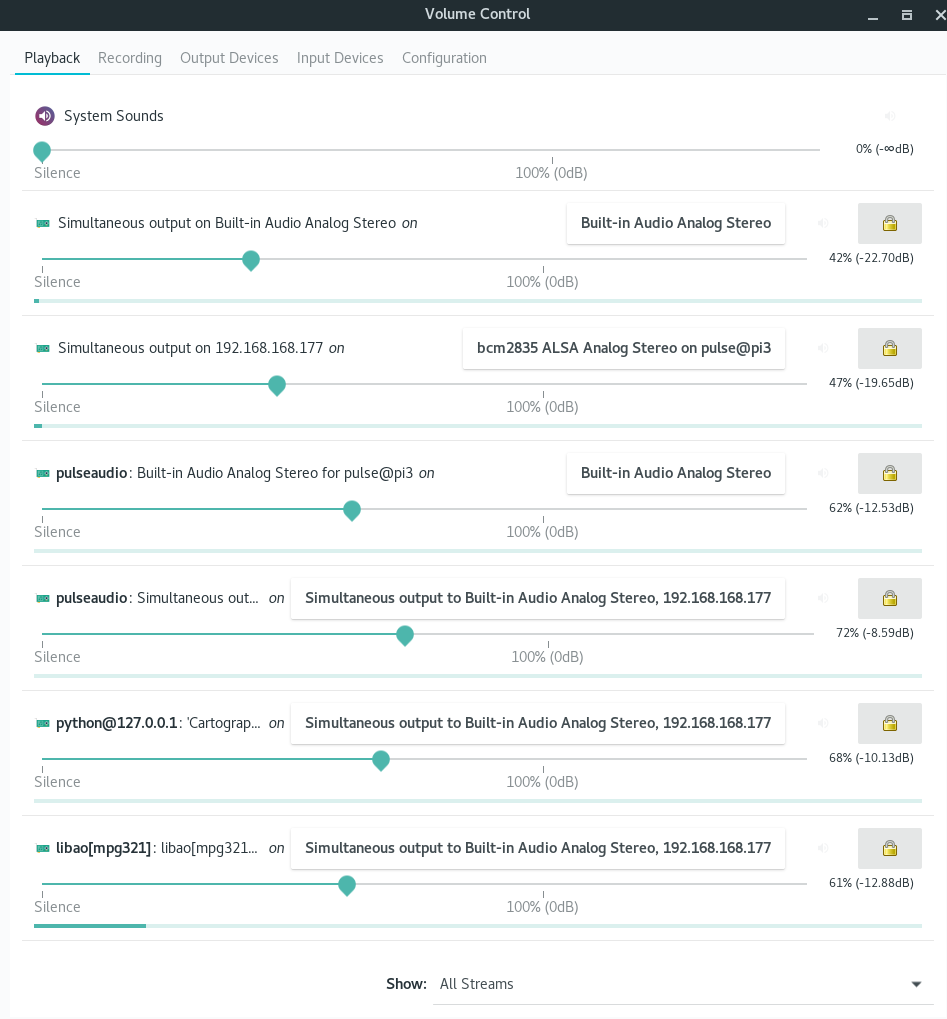
Aww yeah, it’s working. There are a lot of things on this screen but it all makes sense. The mp3 playing is via libao and is playing on the Simultaneous output sink in all room in the house. Adjust volume as needed.
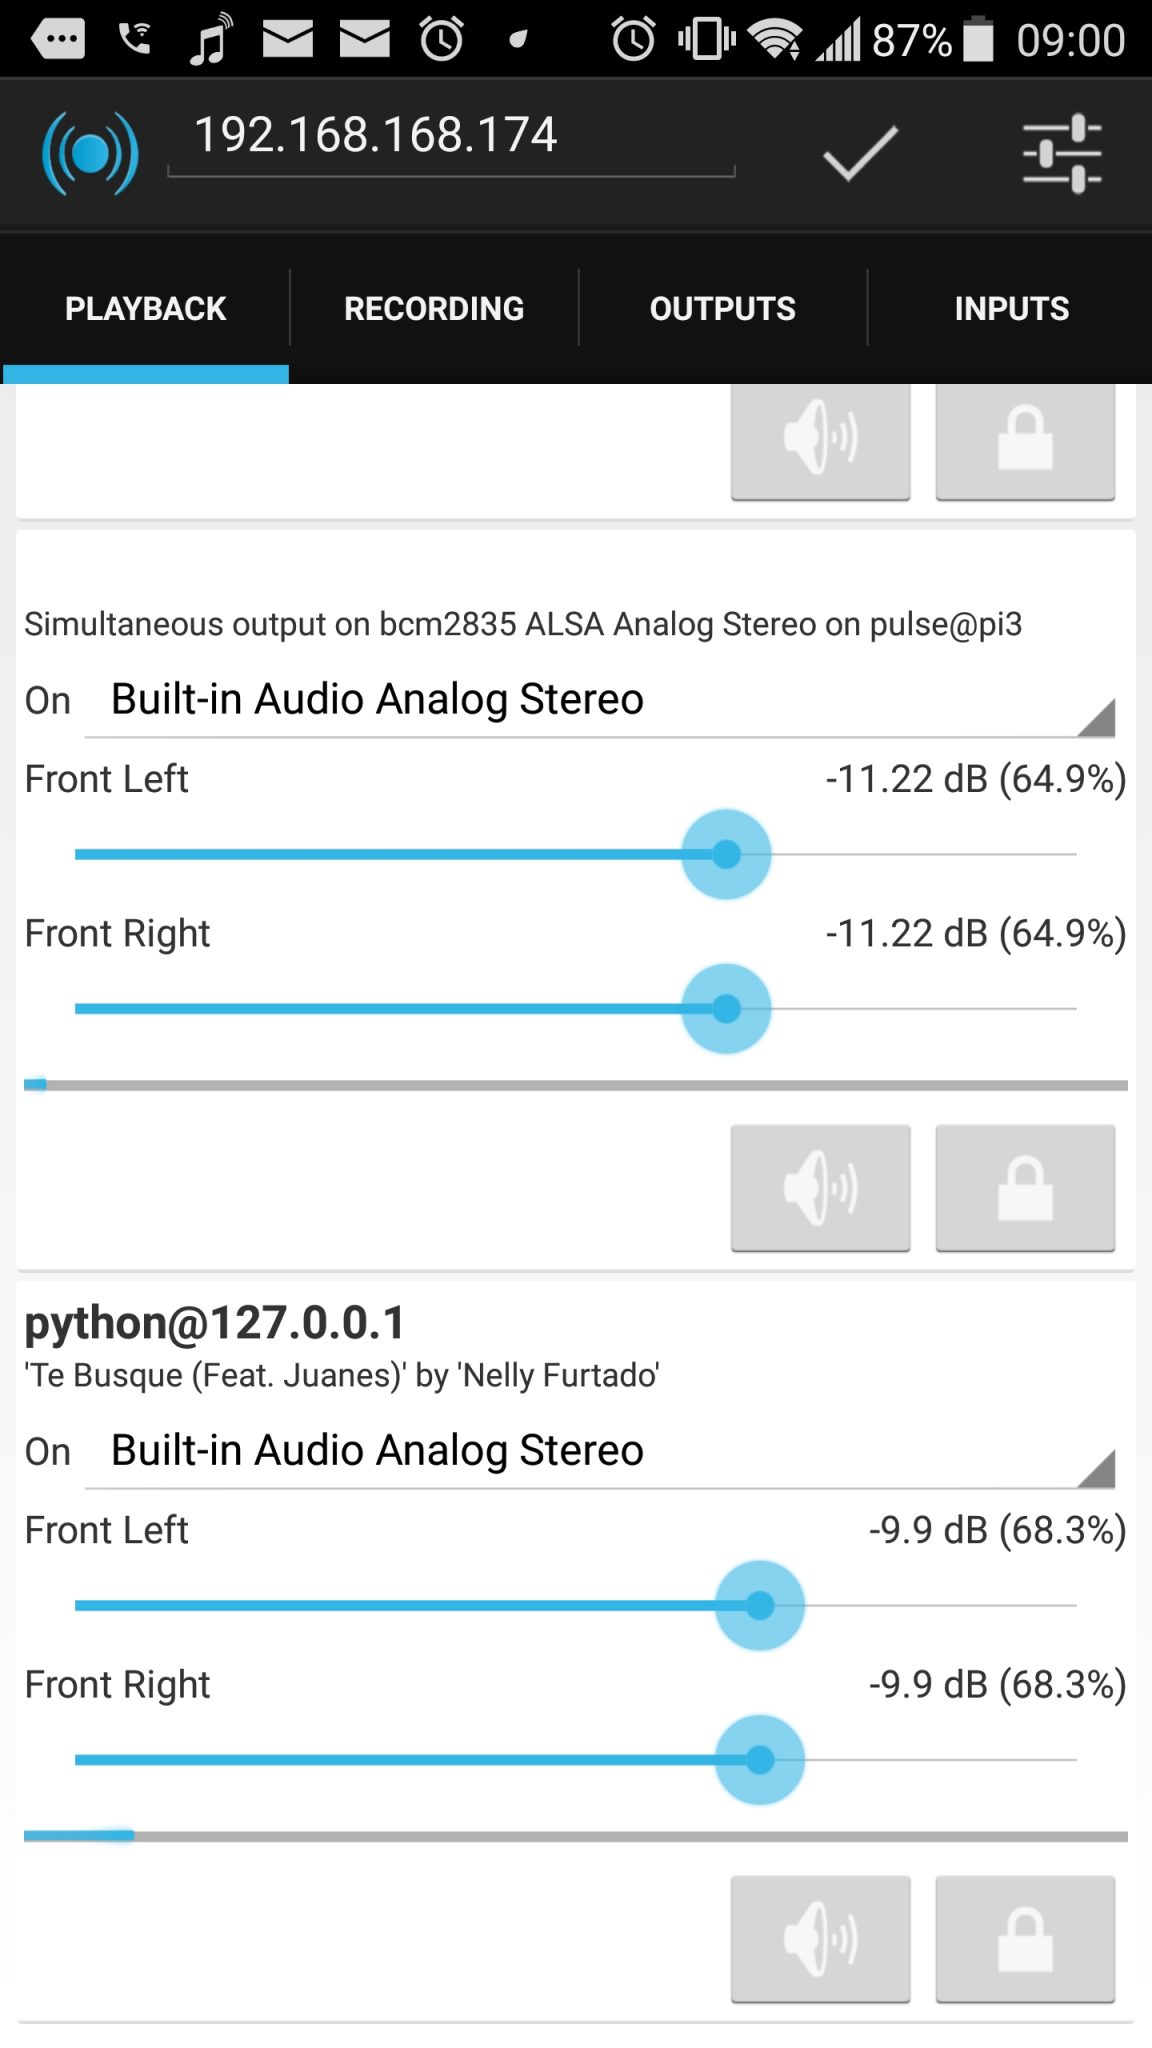
Note that there is an android app that does this too called Reverb and it’s pretty handy when you’re away from the computer.
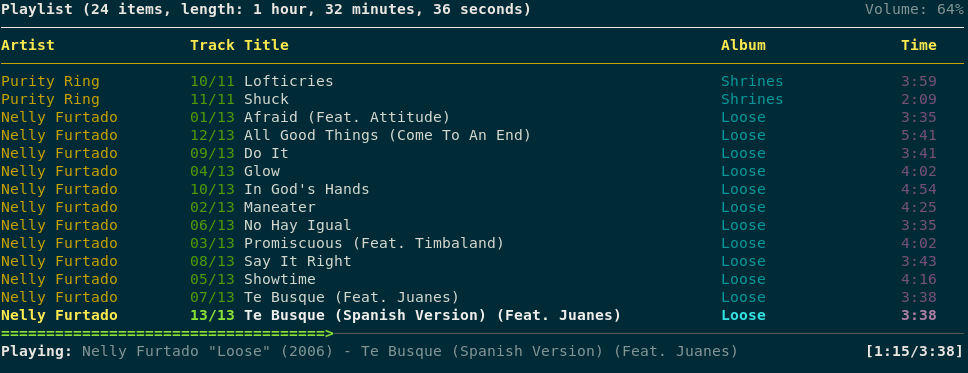
Actually using it
I have a mopidy instance hooked to Spotify and whatnot running on the server too, (that’s what the python@127.0.0.1 thing is). That’s fairly easy to set up and get access to your entire local and remote music collections. In the mopidy configuration (/etc/mopidy/mopidy.conf) , just tell it to send its audio to the PA server, like this:
|
1 2 |
[[audio]] output = pulsesink server=127.0.0.1 |
On the phone, there are a few clients. I’m trying out M.A.L.P., which is working great.

On the laptop, I sometimes just use the command line tool ncmpcpp.
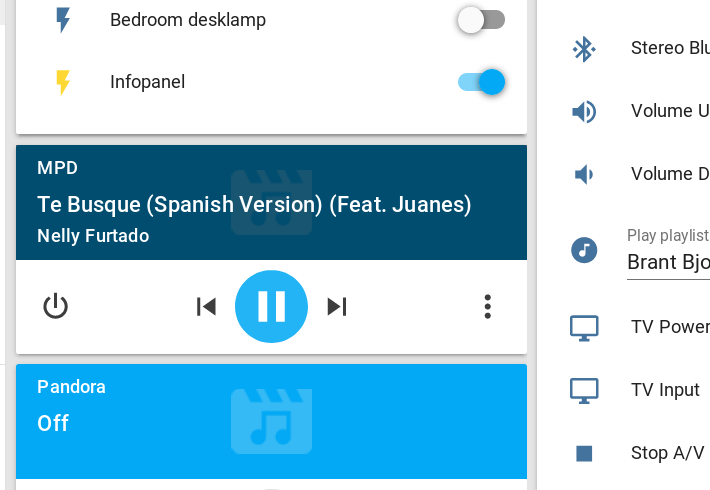
Integration into Home Assistant
Last but not least, this whole setup integrates beautifully into my smart home system running with Home Assistant. For one thing, all noises my home makes can be made in all rooms now (including door-opening chimes, ships bell clock chimes, security alarm notifications, Seinfeld bass transitions, exercise reminders, etc.). Plus, hass integrates very nicely with MPD music players like Mopidy so I can control the tunes directly from the hass panels.
Setup for hass is basically just to set the PULSE_SERVER environmental variable in the startup script for hass. So for systemd that looks like:
|
1 2 3 4 5 |
[Service] Type=simple User=%i ExecStart=/opt/homeassistant/bin/hass -c "/home/homeassistant/.homeassistant" Environment="PULSE_SERVER=localhost" |
In my case, HA is running on the same server as the main PA server so I use localhost. Adjust accordingly.
As always, this whole thing can be controlled from outside the house after I VPN in. This means I could pipe tunes from my home server to myself wherever I am in the world. I guess that’s what Spotify’s for though.
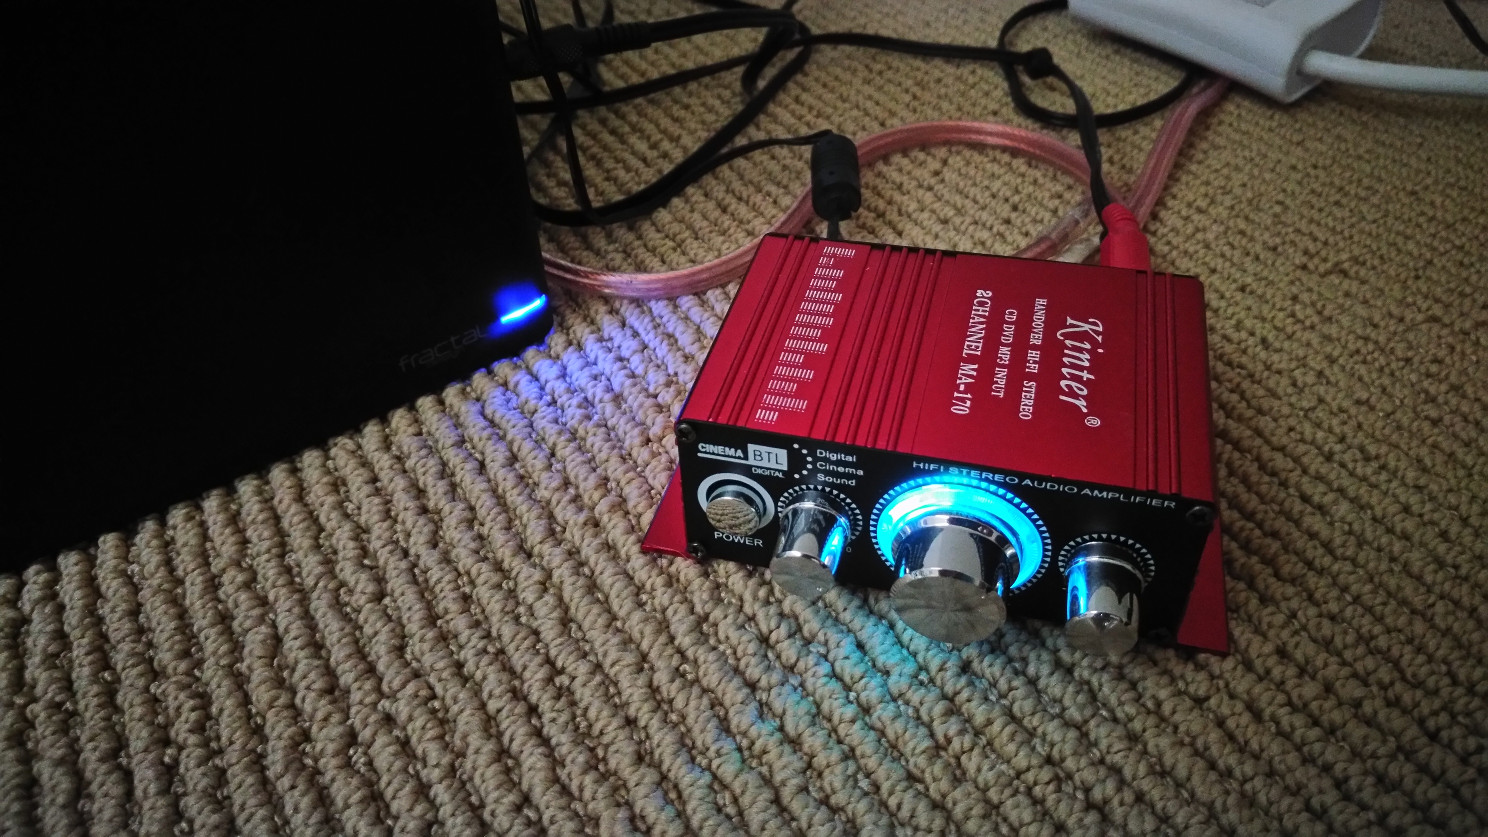
Cheap stereo amplifiers
Not being a huge audiophile, I have been at least moderately impressed that the $10 stereo amplifier I had lying around from another project works fine driving my extra speakers upstairs (my 5.1 setup doesn’t really work well in the living room any more so I moved the rear speakers upstairs). So for expanding this system out cheaply definitely try these things out. Not overly loud but sufficient if you’re on a budget.
See also
This is kind of a simpler project than my remote audio over VPN one I did a few years ago for ham radio.
Hi there!
Thanks for the tutorial.
Actually I’ve stumbled upon you post because I’d like to implement something similar in my house. I’ve got a little question regarding this. Are you able to control sinks from hass?
Cool, good luck! I have not set it up to control the sinks from hass yet but surely you could by calling
shell_commands that run the variouspacmdorpactlcommands to do whatever you want. Those commands can control pretty much everything in pulseaudio.Thanks for that helpful guide!
I noticed that there is still some lag between my local stream and the network sinks. These went away by using module-tunnel-sink-new.
hello there , i tried the following steps .every thing is working fine but in the last command ,
PULSE_SERVER=server pavucontrol
i got error
➜ ~ PULSE_SERVER=server pavucontrol
zsh: command not found: pavucontrol
suggest the solution . thank you
Run
sudo apt install pavucontrolto get that.Hi ,
Very good guide…
Is the ip address in: server=192.168.168.177, the ip address of the pi or the server?
That’s the server.