Building a low-pass filter to remove alternator whine in my car

Ever since I installed a mobile ham radio in my Subaru, there has been a pretty noticeable whine that revs up and down with the engine. I got a few complaints that the whine was on my transmitted signal. I can also hear the whine through my subwoofer, though it is quieter. I needed a low-pass filter to let the DC from my battery make it through to the radio while blocking any alternator-induced AC coming along for the ride. I was going to just buy one but then I searched the web a little and found that it was fun and easy to build my own!

Continue reading Building a low-pass filter to remove alternator whine in my car

Determine your location from relative FM radio signal strengths

In this post, we’ll take a brief measurement of regular old FM radio stations and try to determine where we are. It’s like a GPS but with local FM transmitters instead of satellites. I did this just for fun. I wonder if it could be used for indoor location and stuff? It is nowhere near as accurate as GPS. But whatever.

calibrated_result1Reading FM radio signal power

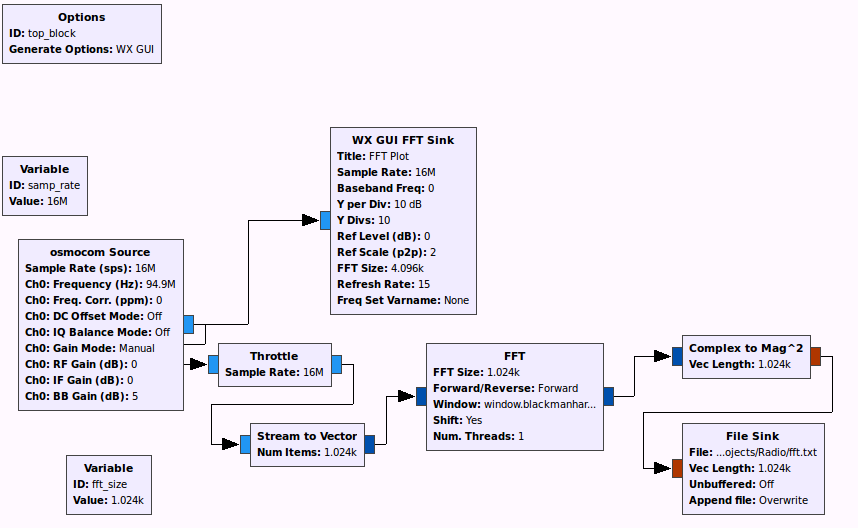
The first step is to get a reading of all the nearby radio stations. I used gnuradio and a HackRF One software defined radio. A simple flow-chart that takes the FFT and dumps it to a file is all I needed. I had to throttle the I/O or else my computer would freeze. I used 16M sample rate to have as wide a bandwidth as possible.

The gnuradio flow-chart used to gather data

The file sink saves the FFT results in 4-byte integers and just has one 1024-length vector after the other. In a few seconds, I had a 50 MB of data. I did all the post-processing in an external Python script.

Continue reading Determine your location from relative FM radio signal strengths

Sending and receiving Morse code with a laser and a Raspberry Pi

Sending and receiving text with Morse code light pulses across the room (or to your neighbor) is a fun and cheap project you can do on a Raspberry Pi or Arduino or any other microcontroller.  This post explains how I did it, and how you can do it too.

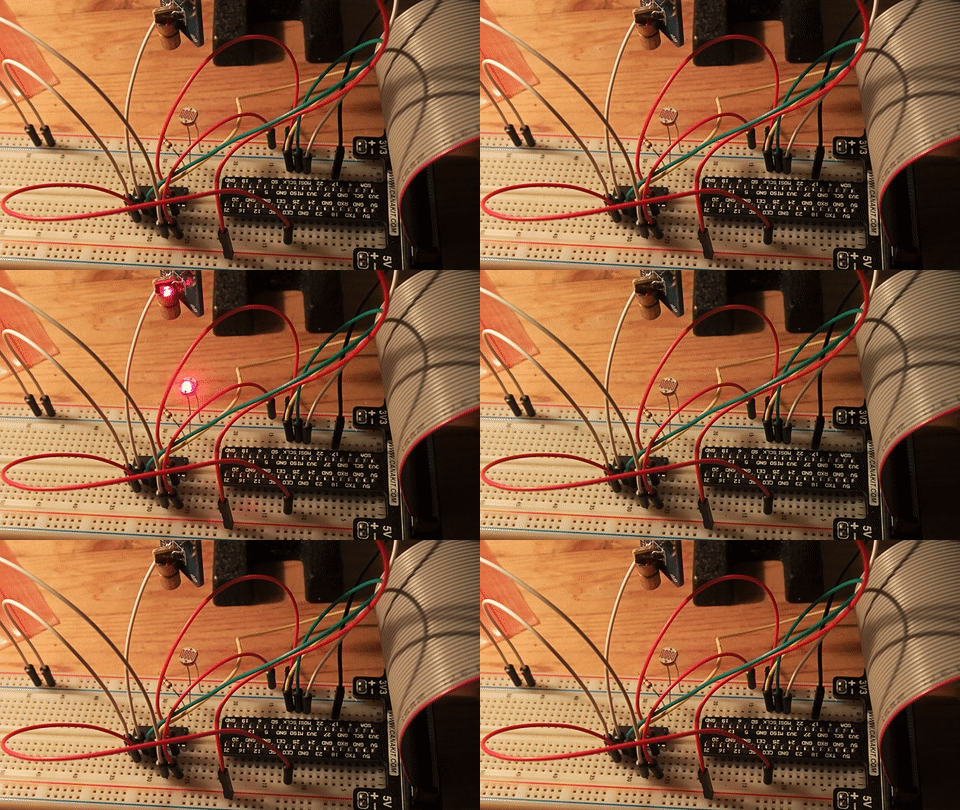
Laser blinking
It’s working!

Hardware

The hardware is simple and cheap. Here’s my parts list:

  • Raspberry Pi B+ as the controller. This does the sending, receiving, and signal processing.
  • Photoresistor – Just a little guy that has variable resistance based on how much light is hitting it
  • A 220 Ohm resistor – to make a voltage divider with the photoresistor for reading the input signal
  • MCP3008 10-bit Analog-to-Digital Converter (ADC) – Since the RPi doesn’t come with an ADC, this is required for converting analog voltage from the photoresistor into a signal I can process on the RPi.
  • Laser module – to transmit with laser light. I got one from sunfounder.com for like 3 bucks.
  • Breadboard, wires

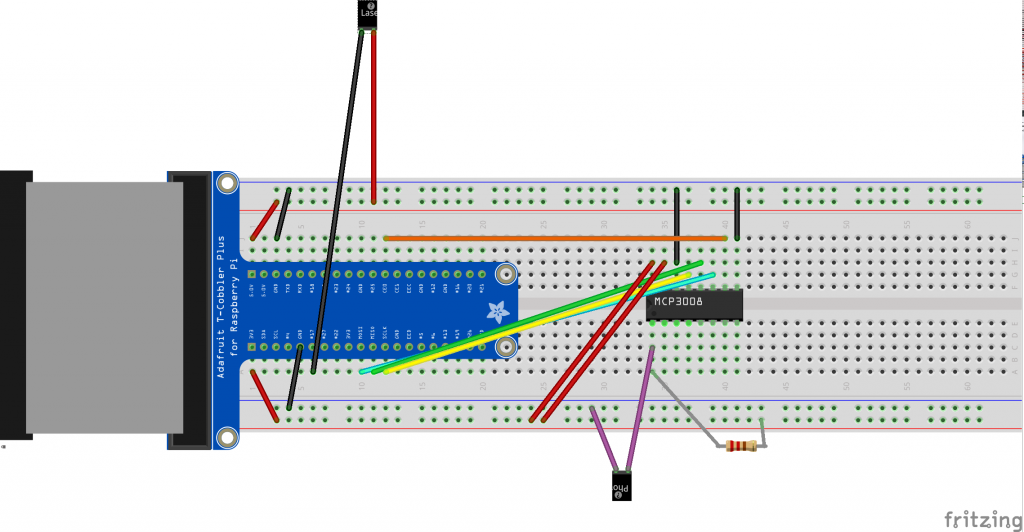
You can learn how to use the ADC at this Adafruit tutorial. I decided to talk to the ADC with the RPi’s hardware SPI interface, which I had already enabled. I wanted to be able to go very fast. (You can alternatively do SPI off of GPIO ports with software, if you prefer.) The laser just hooks directly between a GPIO and +5V. Here’s the layout:

Wiring diagram
The wiring diagram

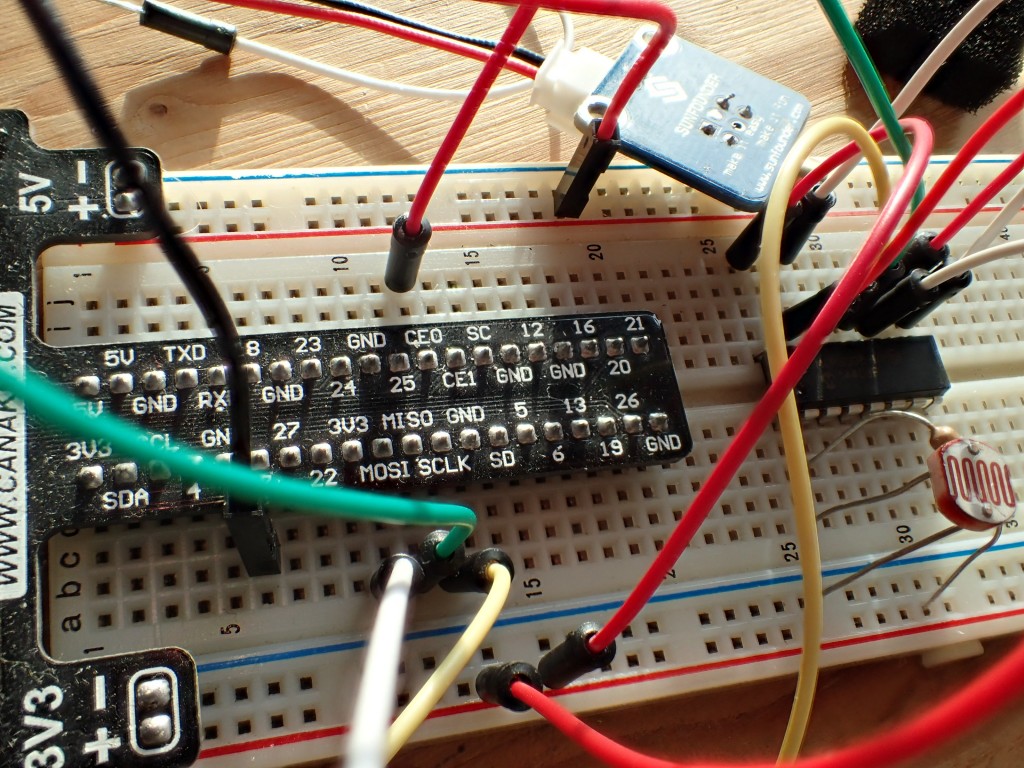
And what it actually looks like:

The actual laserComm hardware.

Continue reading Sending and receiving Morse code with a laser and a Raspberry Pi

Remote ham radio operation through a Raspberry Pi

This post is about how I set up remote operation on my ham radio through a Wifi network, over a VPN, and around the world using a Raspberry Pi, like this:

radio-link-global

This could be useful for people who travel a lot and want to be able to use their rig while away. Or for people who want to set up their radio and antenna far away from where they actually live (e.g. apartment dwellers who have friends or parents who live in the boonies and wouldn’t mind you erecting an antenna). If you want to skip the VPN and just control your ham shack from your kitchen, that’s even easier.

I did this all with an ICOM-7100 all-mode radio, a Raspberry Pi B+, a Buffalo DD-WRT router/VPN server, and a laptop running Ubuntu 15.04. This post focuses on the radio control and networked audio but not on setting up the VPN.

Continue reading Remote ham radio operation through a Raspberry Pi

My first day on the amateur radio HF bands

I got into ham radio a few months ago and upgraded to a General-class license last weekend. This is a big step for ham radio people… the moment where you go from being able to talk to people ~30 miles away to being able to talk around the world. Anyway I went out and got a new 100W all-band, all-mode radio, an auto antenna tuner, a deep cycle battery, a 30A power supply, and a mini-Buddipole antenna. Woo!

I had a lot of trouble getting my first contact. I tried every night after work all week. I tried from Volunteer Park, my communal rooftop deck, and my friend’s roof on the 33rd floor of his building. I set the Buddipole up for 20m and heard people from the park but they couldn’t hear me. On my rooftop, I got nothing but S9 noise everywhere and couldn’t hear a thing. Same story from friend’s roof.

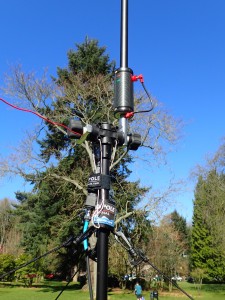
Well, I found that you can’t just use the settings that come in the Buddipole manual. Especially if you have the 8ft mast. It’s not high enough to do a 20m dipole efficiently (all RF goes straight up in the air. Read this whole book to understand). So you have to set it up as a vertical like this:

Buddipole as 20m vertical
Buddipole set up as a 20m vertical.

Continue reading My first day on the amateur radio HF bands

Installing the RF shield in a HackRF One

I recently got a HackRF One software defined radio (SDR) to go along with my new Ham radio hobby. I’m new to all this, but one of the first things I noticed was that I was picking up a lot of radio frequency interference (RFI). I had purchased a RFI shield as part of the kit but had to install it myself. This post shows how I did it.

Opening the HackRF enclosure

The first challenge is opening the enclosure. To do this, first take the bolts and washers off of each of the SMA antenna connectors. Now, go in above one of the connectors with a little screwdriver (maybe put electrical tape over it) and start popping up the enclosure. Eventually you will pop it all up.

Installing the RF shield

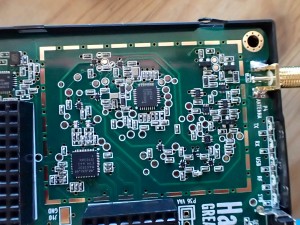
Now we have to solder the RF shield onto the board. There’s a dotted line that shows where it goes.

Here's where the RF shield will go.
Here’s where the RF shield will go.

Continue reading Installing the RF shield in a HackRF One