I’ve been working on a home-brew weather station and was looking into rain sensors when I discovered that you can get infrared (IR) rain detectors. A company in Minnesota sells one called the Hydreon RG-11. They shoot pulses of IR light around a plastic dome and monitor them on the other end. When rain hits the dome, the refraction changes and the pulses received are perturbed. This is nice because it’s very simple and has no moving parts. I figured I’d be able to find a way to read it into my weather station.
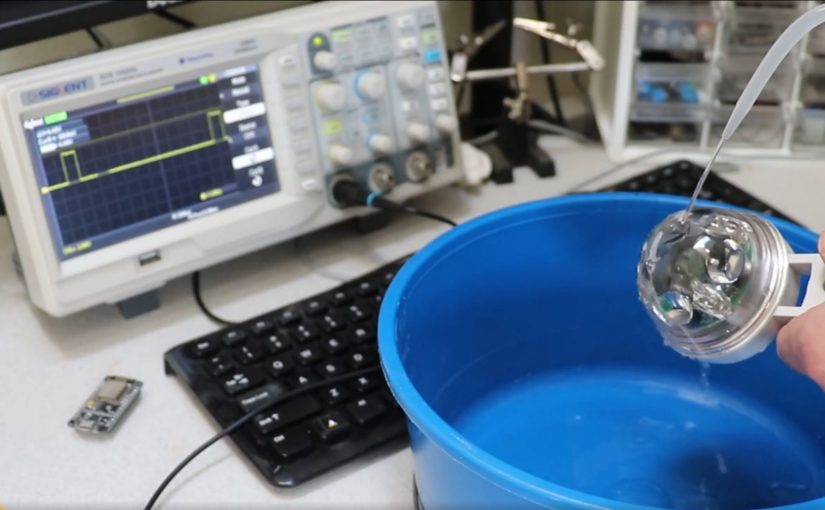
There are a variety of modes you can use. I wanted early indication of when it started raining (so I could get an alert from Home Assistant to close the windows). But I also wanted some measure of the actual rain intensity. Thus, I decided that a small “tipping bucket” mode would work best for me. In this mode, the sensor just closes a relay whenever it thinks a certain amount of rain has fallen. Here’s a quick demo of it clicking:
You can set the sensor to click at various sizes. Light, moderate, heavy, and violent rain rates are defined as follows:
| Rain intensity | mm/hr | in/hr | 0.01″ clicks/hr | 0.001″ clicks/hr | 0.0001″ clicks/hr |
|---|---|---|---|---|---|
| Light | <2.5 | 0.098 | 9.8 | 98 | 980 |
| Moderate | <7.6 | 0.3 | 30 | 300 | 3000 |
| Heavy | <50 | 2.0 | 200 | 2000 | 20000 |
| Violent | >50 | >2.0 | >200 | >2000 | >20000 |
In testing, I got a zillion clicks out of my little squeeze bottle on the most sensitive setting, so I put it on 0.001″/click. But then I put it out in the misting rain of Seattle and it only clicked like once. So I did the math above and realized that in Seattle, the 0.0001″/click setting is probably the most useful one.
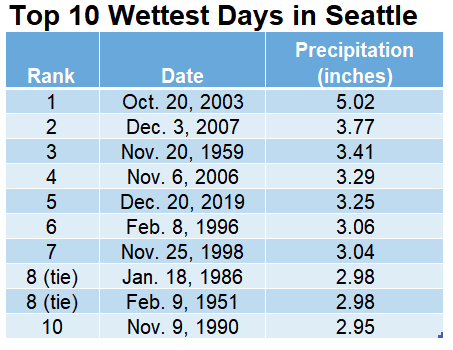
So, averaged over the rainiest day in Seattle history, I would see one click every 1.7 seconds. Surely there were periods of extra intensity, and the sensor will peak out clicking like crazy in those times. We will see if that becomes a problem.
Here are some basic counts that have been sent to my Home Assistant controller. I set it up to give a nice “drop” sound when it goes above zero to help me remember to close the window.

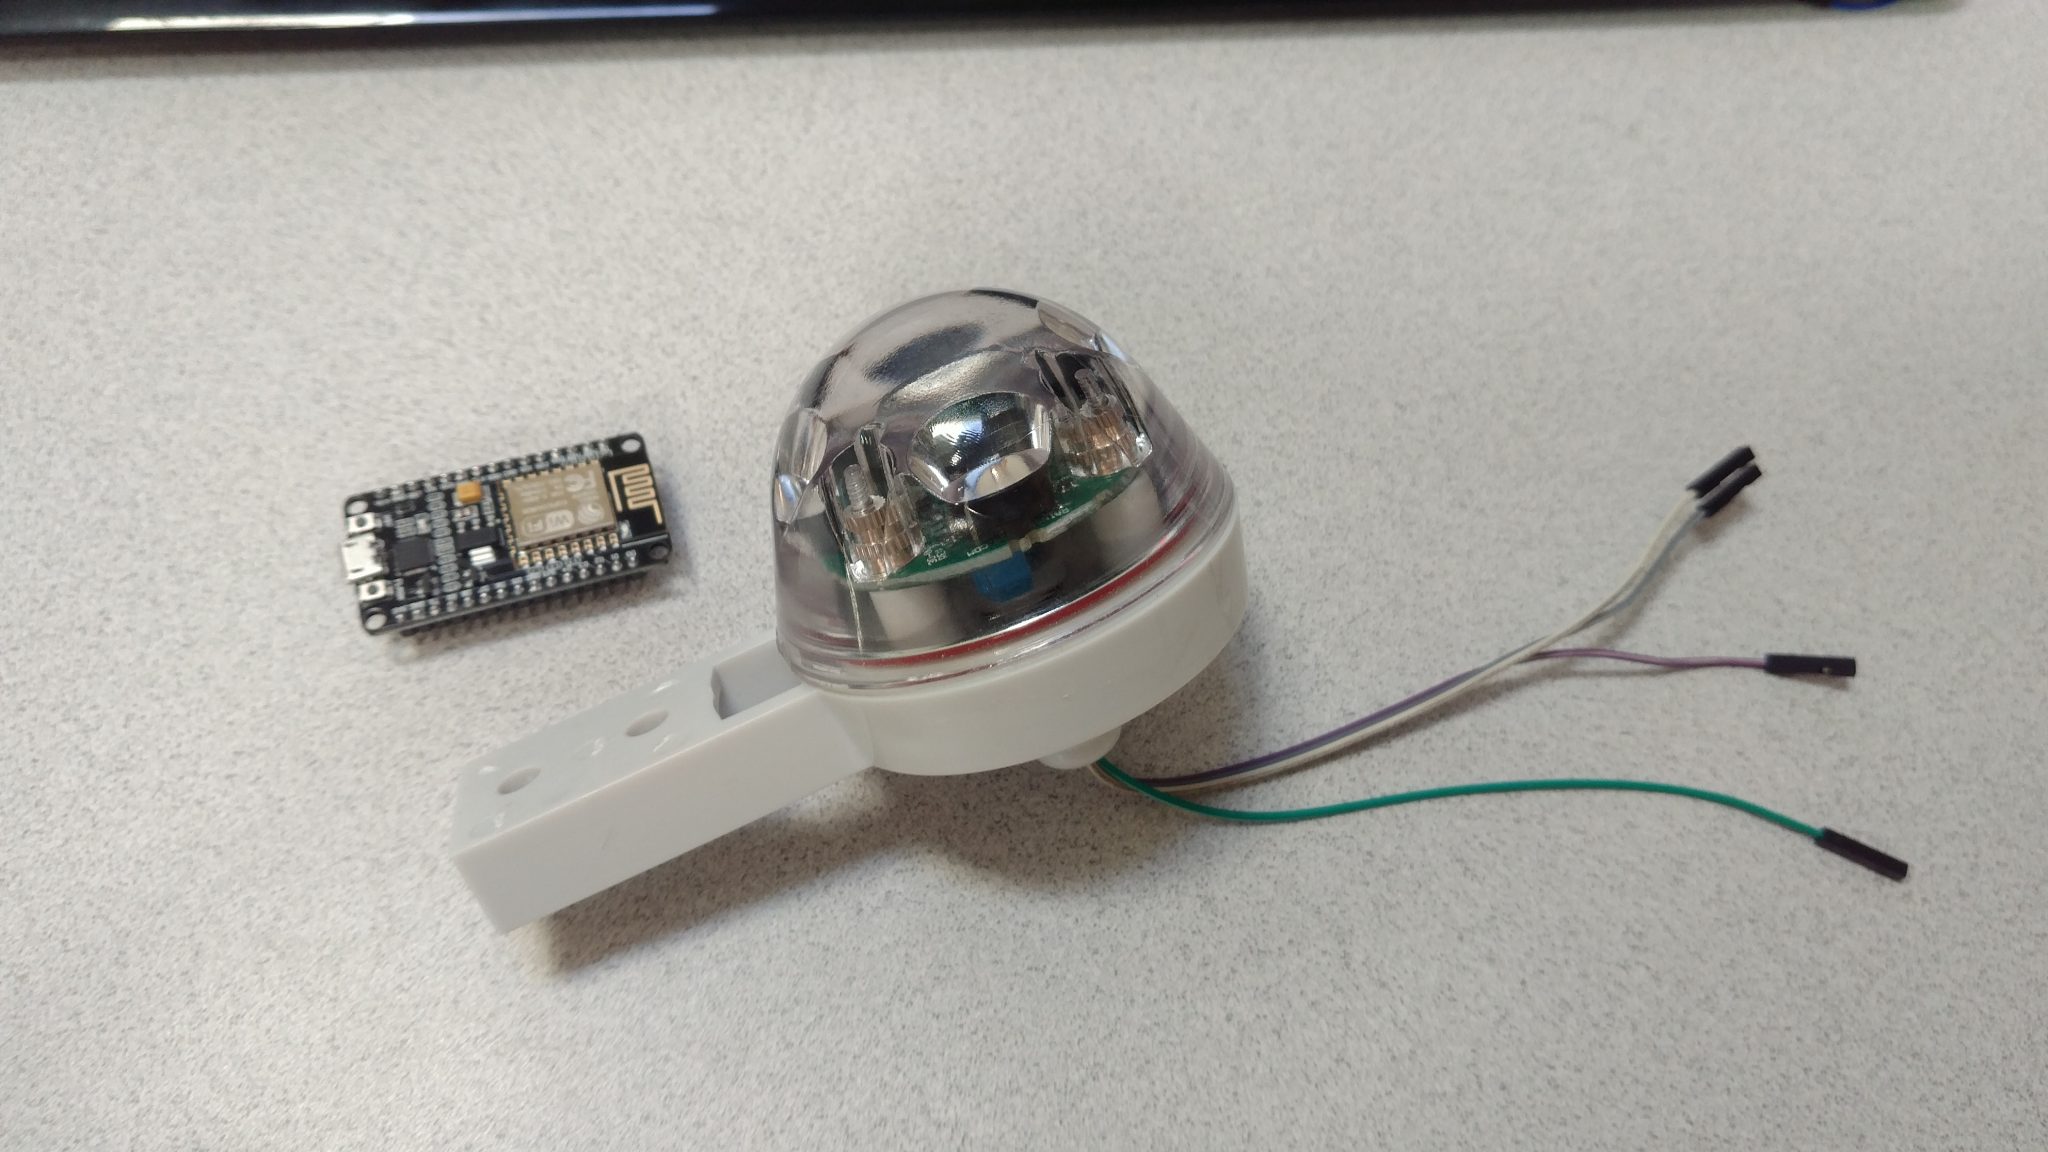
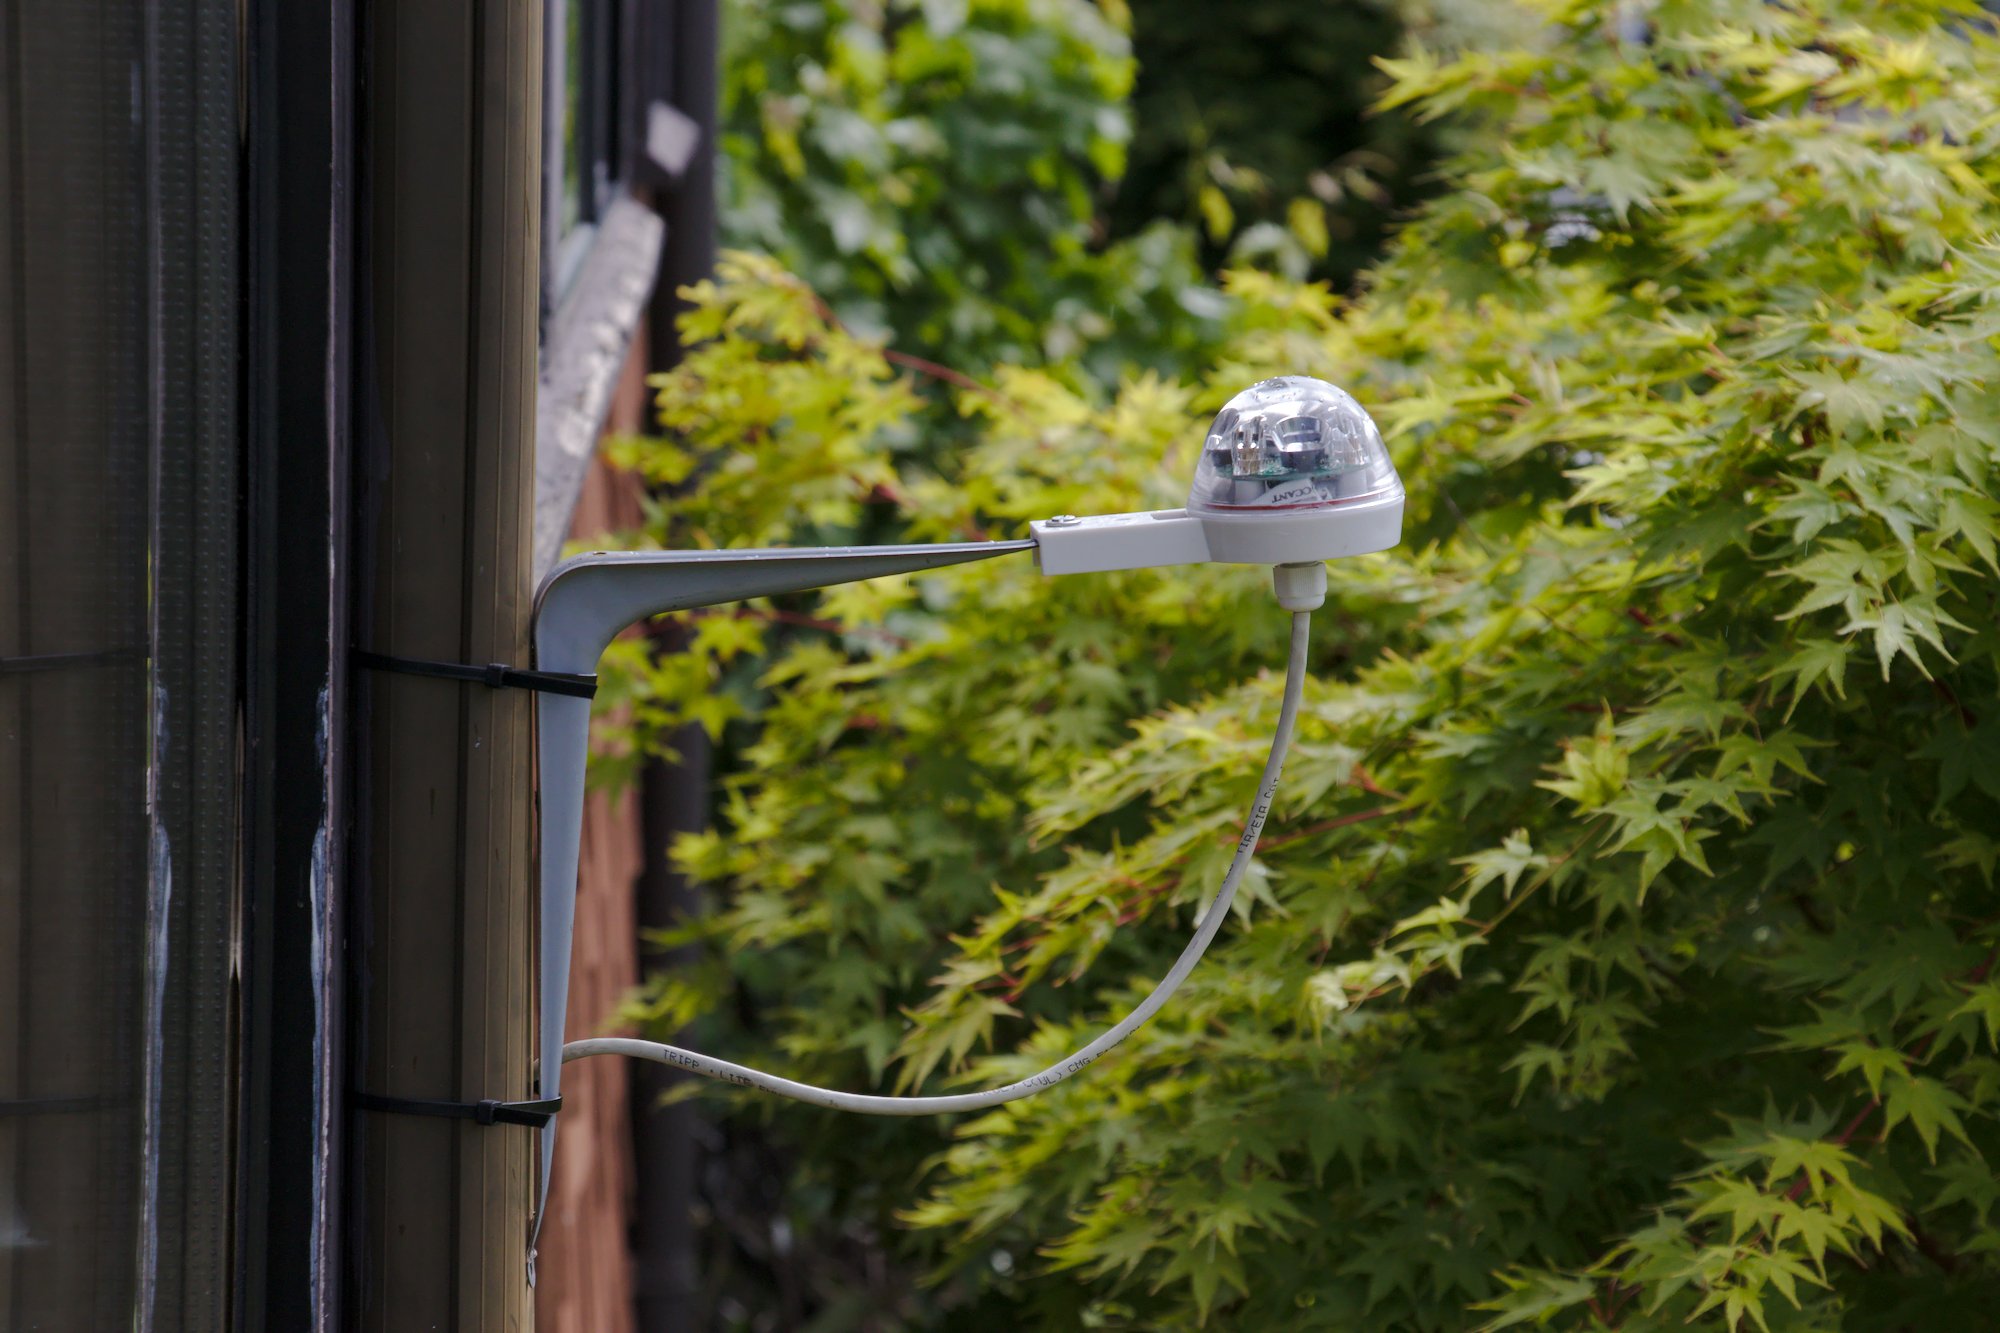
I temporarily mounted it with non-waterproof, non-UV resistant cat5 cable and a indoor mounting bracket. Once COVID lets up (or I get a mail-order), I’ll replace these with waterproof stuff and stainless hardware.
Making a 12V to 3.3V voltage divider
The sensor needs 12V to operate, but ESP8266 and Raspberry Pis can only handle up to 3.3V on their GPIO digital input pins. I could run a separate 3.3V data line to the relay for signaling, but I decided to be more economical and just use the power line as the signal line as well. Besides, 12V signals will travel over longer distances on cables than 3.3V ones. Of course I have to step 12V down to 3.3V before going into the GPIO. Since the GPIO signal is very low current, this is appropriate.
UPDATE: I was convinced to just run 3.3V in this case rather than a voltage divider because if the ground fails or something else goes wrong, the ESP would see the full 12V and be fried, so it’s just not that safe. But the voltage divider info is still here…
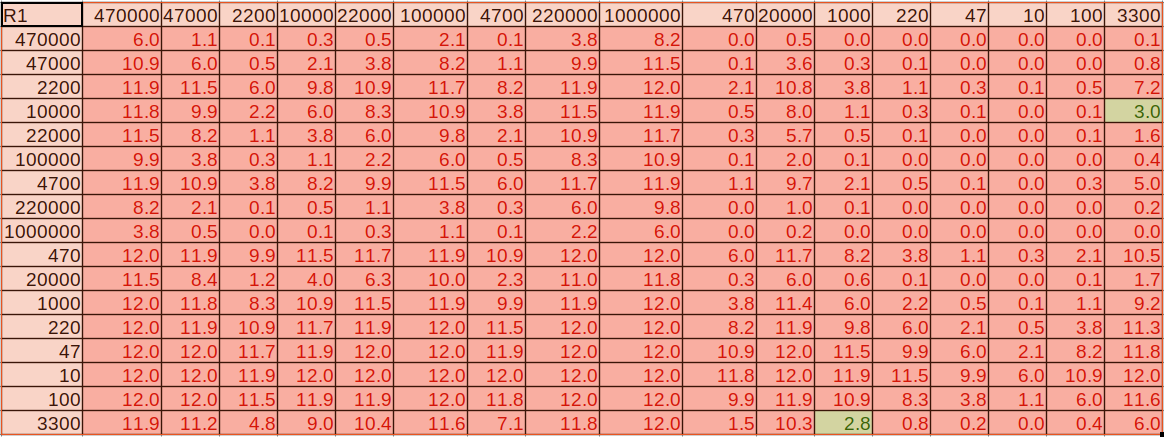
We know the threshold for a HIGH signal in ESP8266 is about 2.5 V so we need a voltage divider that can go from 12 to somewhere between 2.5 V and 3.3 V. I dumped out my collection of resistors and made a spreadsheet with the options:
Here’s a quick video showing the output pulses from the voltage divider on my scope:
I will be running outdoor CAT6 cable to it once it’s mounted. I will only need three of the cables: 12V in, ground, and 12V pulses out for signaling the tipping bucket.
The code
And that’s about it. To wire it up to the ESP8266 or Raspberry Pi you just use the same interrupt code that you’d use for, like, a PIR motion sensor or anything. In the code, you just count the number of pulses and divide by a running clock to get a read-out of precipitation per hour, or whatever.
Here are some code snippets to read the pulses in a ESP8266. I also have a software timer that sends reports over MQTT every 30 seconds and resets the count.
#define RAIN_PULSE D3
long rainPulseCount = 0L;
volatile bool rainFlag = false;
void setup()
{
Serial.begin(115200);
// clipping relay grounds the pin, causing it to go down
pinMode(RAIN_PULSE, INPUT_PULLUP);
attachInterrupt(digitalPinToInterrupt(RAIN_PULSE), rain_ISR, FALLING);
}
ICACHE_RAM_ATTR void rain_ISR() {
rainFlag = true;
}
void loop()
{
if (rainFlag) {
// Just bump the rain counter. Each bump is 0.01" of rain.
// Will reset after reporting
Serial.println("RAIN!");
rainPulseCount++;
rainFlag = false;
}
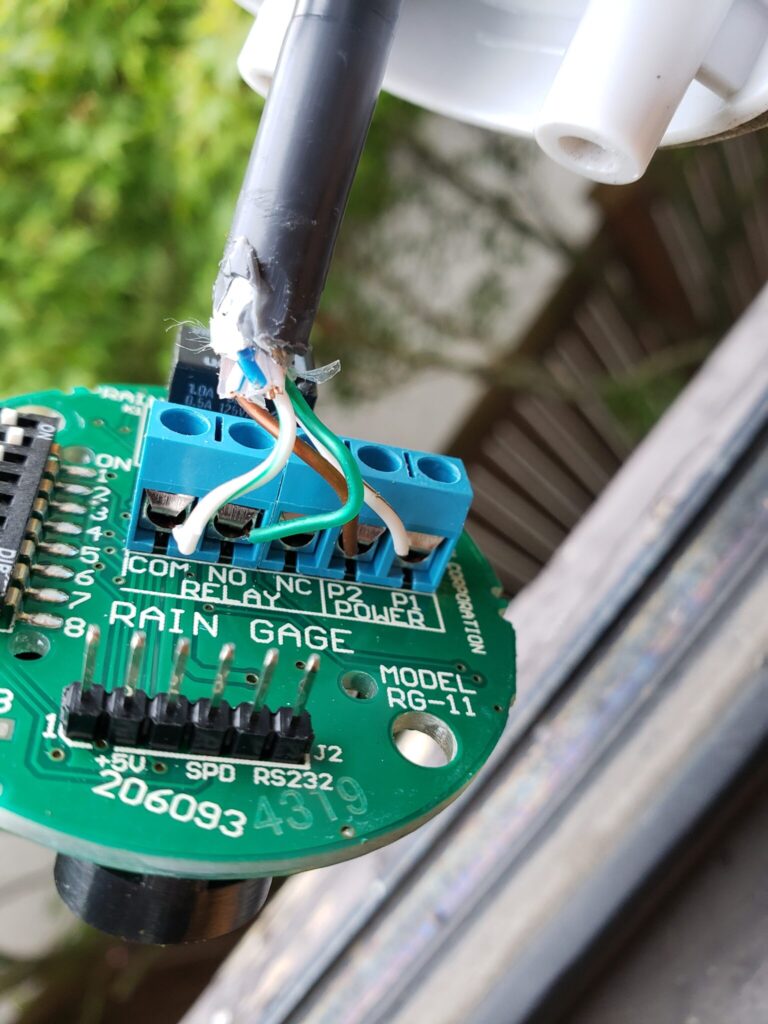
}Here’s how I wired up the tipping bucket mode. The relay output was just connected to a digital IO pin on the ESP.
Very cool!
What connector did you use to connect J2 (2 x 4 pin) on the Hydreon RG-15 (or, did you not use that connector. )
I only connected to the relay terminals and then just count the pulses on a digital I/O pin on the ESP8266.
hi, I bought this rain sensor, model RG-9.. but I couldn’t get it to work with the Arduino Mega 2560… Would you have a schematic of the connection of the wires?
Hi. Sure thing. Just added a pic to the bottom of the post for ya.
thank you… i try…
You don’t need a voltage divider. The output is a relay that is Normally Open (Normally Closed is also available). A simple pull-up resistor to 3.3V at the ESP8266 input would take care of the ‘1’ when the relay is open.
Hi, thanks for sharing your experience with the RG-11.
I’ve bought one myself and now I’m trying to use the poorly documented serial port which the manufacturer will not support.
I’ve started to write some code and documentation – although unfinished. But it works and I get data, now I just have to find out what the different values mean.
Here my repository:
https://gitlab.com/pbueker/rg-11-rain-gauge-wifi
Hi,
great job and description, thank you. But can you please provide a wiring scheme?
Take care
Gunter
very nice project.
as I am new on the same way it would help to have a wiring schema on 12v power supply to power up the sensor as well as the esp32 board.
are you still using your code or the esphome implementation?
regards
Hey, I’m using RG-15 with Arduino UNO and the library is not working. Can anyone please suggest me a correct library.
Dear Shahid, I face the same issue and tried even with Arduino Uno. No results. I am not new to Arduino. Now have contacted the supplier. Lets see what they will tell & provide. Greetings, Manfred
If you are using the RG-15 as a Tipping Bucket you do not need a library. Just feed the output into a pin on the espxxx. Write the interrupt routine. The output of the RG-15 is an open collector. You will need a pull-up resistor. The signal will go low when a drop hits the RG-15.