I’ve always dreamed of having a “smart-home.” There’s just something cool about being able to flip switches and read sensors and have a program turn a light on when you open the door, but only if it’s dark. This post is about home automation.
UPDATE: I made a video demoing everything:
I learned a lot during the process and am still learning. There are all these low-power sensors and things that use a radio technology called Z-wave. Basically, you know about wifi and bluetooth. Well there’s also Z-wave and Zigbee and some others that are made to be really low-powered, low-bandwidth for (possibly battery-powered) internet-of-things devices like switches, sensors, lights, etc. So I got some zwave stuff.
Here’s the hardware I have:
- UPDATE 2023: Do not use Hue. They switched their policy to require connecting to their cloud, reversing a decade-old policy of allowing local-only control. This is a shame, and I’m moving away` from Hue for this reason now.
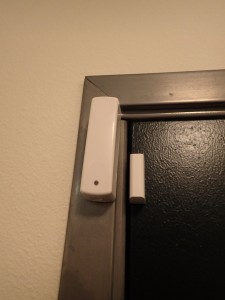
HUE color-changing LED lights can be controlled from my phone or laptop whether I’m in the house or out of it - A door sensor tells me when the door is open or closed.
- A security camera can pivot around the apartment and see what it looks like
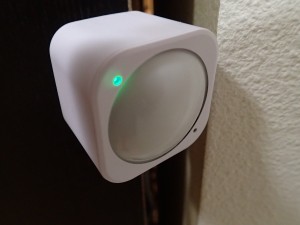
- A Multisensor records temperature, relative humidity, light, and UV, and has alarms for motion and jiggling
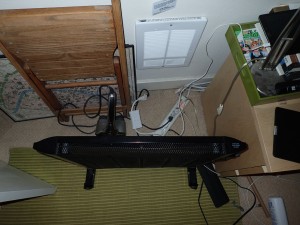
- I have two in-line plug-switches. One that turns on and off a big light and the other that turns on and off my space heater
- A router with DD-WRT installed set up as a VPN server (so I can securely access my home network when away)
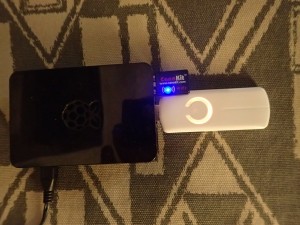
- A Raspberry Pi 2 with a Z-wave Aeon Z-stick USB dongle
With those components, I can do all sorts of neat things, like:
- Turn the heat on when I’m on my way home so it’s warm when I get there
- Turn lights on and off from afar
- Get notifications on my phone if there’s motion when I’m not home or if the temperature drops below a certain value
- See how much energy (in kWh) I’ve used for heat
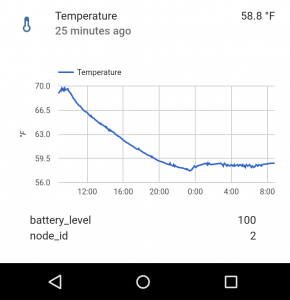
- See neat graphs of temperature and light vs. time throughout the day.
- If I walk towards the bathroom in the middle of the night, turn on a dim red light so I can see. Turn it off automatically in a few minutes.
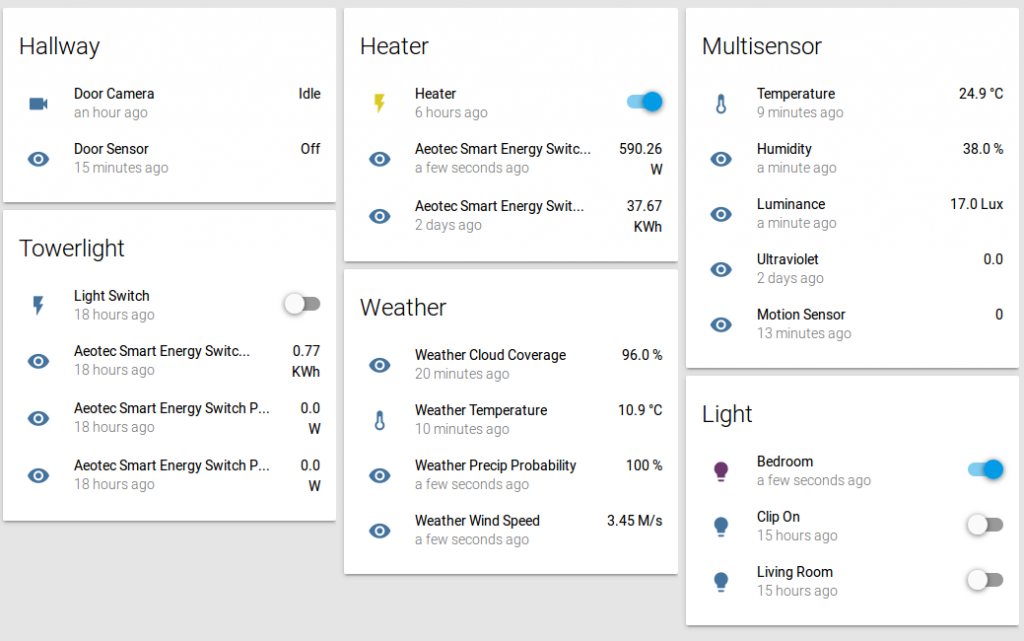
Here’s what the control panel looks like. It’s just a webpage on my local network. It works from the laptop, the phone, the tablet, etc.
Setting it all up
There are off-the-shelf hubs that can do a lot of this that most people would be happy with. That just isn’t me. I really like open-source stuff, I don’t want my home hosted by some third-party company (no “cloud”), I do a lot of programming in Python, and I like Raspberry Pis. I chose to try home-assistant as the driver of all my automation, and have been really happy with it, but I did have to contribute to it a bit to get it working properly, which is really fun. So here’s what I did. Hopefully this will help someone who’s searching for info.
Raspberry Pi 2, home-assistant, and the Aeon Z-Stick
Home-assistant needs Python 3.4, so the first thing you have to do is make sure your Raspberry Pi 2 has at a Raspbian OS based on Debian Jessie on it. Upgrade like this. Then, install home-assistant as described on their webpage. The complex part is building the openzwave library to give home-assistant access to the Z-wave stuff. The current home-assistant instructions work, but you won’t get good support for newer devices like the Aeon Multisensor 6. I’ve been working on unforking the library but there are some lingering issues. If you want to just install my fork, it will work (checkout the python3 branch).
UPDATE: With version 0.15 of home-assistant, unforking the library has been accomplished. You can now use the current home-assistant instructions.
I recommend making an alias for your Z-stick so it always shows up as /dev/zwave
instead of, like, /dev/ttyACM0 or /dev/ttyACM1. You can do this by running
|
1 |
$ udevadm info -a -n /dev/ttyACM0 |
and noting the idVendor, and idProduct, then add a line to new file, /etc/udev/rules.d/99-usb-serial.rules:
|
1 |
SUBSYSTEM=="tty", ATTRS{idVendor}=="0658", ATTRS{idProduct}=="0200", SYMLINK+="zwave" |
Configuring the Aeon Labs Multisensor 6
This multisensor is pretty cool but by default it only sends updates once an hour. When on battery, this makes sense because this will drain the battery in like a year, and more frequent updates would drain it faster. But if you plug it in to power, you’ll probably want quicker updates. I figured out how to adjust the configuration using the python-openzwave library that was installed above. Here is an example script that does some config of stuff. Run it with ipython3 or python3.
(UPDATE: You can alternatively use the web-gui ozwcp. )
|
1 2 3 4 5 6 7 8 9 10 11 12 13 14 15 16 17 18 19 20 21 22 23 24 25 26 27 28 |
from openzwave.option import ZWaveOption options = ZWaveOption('/dev/zwave', config_path='/home/pi/python-openzwave/openzwave/config', user_path='.', cmd_line='') # or /usr/local/share/python-openzwave/config if installed # /home/pi/python-openzwave/openzwave/config if testing options.set_append_log_file(False) options.set_console_output(True) options.set_save_log_level('Debug') options.set_logging(False) options.lock() from openzwave.network import ZWaveNetwork network = ZWaveNetwork(options, log=None) node2 = network.nodes[2] print(node2.product_name) # this is the multisensor on my network. Yours may be a different node. # get current config values node2.get_sensors() node2.request_all_config_params() # set timing and stuff on multisensor node2.request_config_param(111) # this shows the current interval (3600 seconds) node2.set_config_param(111, 120) # set the temperature sensor interval to 120 seconds node2.set_config_param(3, 125) # set motion sensor On duration to just over 2 minutes. (shorter and it never registers as on!) # set reporting of power level on Aeon smart energy switches node5.set_config_param(101,2) # send multisensor info about power node5.set_config_param(111,20) # send it every 20 seconds. network.stop() |
So yeah, that’s cool. You can poke around and do lots of low-level zwave stuff with that. The api-demo.py that comes with python-openzwave is pretty interesting if you want to learn more.
Then, to get the multisensor to turn a Phillips HUE light on red on motion in the middle of the night (assuming you’re heading for the bathroom), try this:
|
1 2 3 4 5 6 7 8 9 10 11 12 13 14 15 16 17 18 19 20 21 22 |
automation: - alias: Turn on light on motion trigger: platform: state entity_id: sensor.aeotec_multisensor_6_burglar from: '0' to: '8' action: service: light.turn_on entity_id: light.living_room data: brightness: 254 rgb_color: [255, 0, 0] condition: - platform: time before: '05:00' - platform: time after: '01:00' - platform: numeric_state entity_id: sensor.aeotec_multisensor_6_luminance # At least one of the following required below: 4 |
You’ll want another rule to turn it off later, like a few minutes after the motion sensor stops seeing motion. Anyway you get the idea.
The installation of the custom fork of python-openzwave is the biggest pain right now. Hopefully we’ll get that all worked out soon so this will be easier.
I run home-assistant in a screen instance, though there are more correct ways to get it to work when you log off the raspberry pi.
Oh and for notifications on my phone, I set up an Instapush account using this component. My config for this isn’t perfect but I am getting notifications.
|
1 2 3 4 5 6 7 8 9 10 11 12 13 14 15 16 17 18 |
automation: - alias: 'Alert on Low temperature' trigger: platform: numeric_state entity_id: sensor.aeotec_multisensor_6_temperature below: 18.0 action: service: notify.notify data: message: 'Temperature at Apt Low' notify: name: notify platform: instapush api_key: [redacted] app_secret: [redacted] event: motion tracker: sensor |
Next steps
- I have to get more serious history plots working with InFluxDB. There’s a ticket for that. I got it and graphana compiled on the Raspberry Pi after some efforts following these instructions. The dependency phantomjs takes like 2 days to build on the Raspberry Pi so I got a pre-built one from here. It worked but I wish I could have built it myself.
- More lights!
- Z-wave smoke detector
- The original motivation for learning this was to monitor my mom’s house for furnace breaks when she’s away so the pipes don’t freeze. Her house could also use a flood sensor in case the pipes break and flood the basement like they did in like 1989.
Hope that helps someone.
Oh, and one thing I’ve had trouble with is when I unplug the Z-stick (ZW090) from the Raspberry Pi and plug it in to my laptop, I see nothing at all in /dev/ for it, and no messages from dmesg. It’s like, dead to the usb. I even tried pressing the reset button and cannot for the life of me get it to reappear. When I plug it back into the pi, it works fine. If anyone knows how to fix this, let me know!
UPDATE: It was just a bad USB connection. I put it in a different computer and it worked fine. A USB extension cable also works!
UPDATE 2: I just added Infrared capabilities and can now control my A/C, TV, and stereo too.

Hi Nick!
First of all, thank you for this post! It helps a lot!
Like you, I’m looking for an nice integration of the Z-Wave Aeon Multisensor 6 into Home-Assistant running on my RPi.
I installed the “official” version of the python-openzwave but like you said, the integration isn’t really… up to date… So… I tried yours 🙂
The python-openzwave build on the RPi was not straightforward. But in the end I did it like this:
git clone https://github.com/partofthething/python-openzwave.git
cd python-openzwave
sudo make repo-deps PYTHON_EXEC=python3
make update PYTHON_EXEC=python3
make build PYTHON_EXEC=python3
sudo make install PYTHON_EXEC=python3
Now I’m able to use the openzwave module in python3. But when I start Home-Assistant I got this exception :
“LibOpenZwave Generic Exception : Can’t retrieve zwcfg.xsd from /usr/share/python-openzwave/config”
I have no idea what should be in this file. I manually create the config folder and didn’t define any config location in the HA yaml config file. Do you have any advice or do you know any documentation for this ?
Thank you in advance.
Best regards
David
There is now a pure Python alternative to open-zwave:
https://github.com/robertmuth/PyZwaver
Note quite feature complete but getting there.
Nice! Thanks for the info. Looks like a great project. I’ll keep my eye on it.
Okey, like everytime… found the solutions 10sec after asking.
Here they are :
https://github.com/OpenZWave/open-zwave/tree/master/config
Not sure if they should be installed automatically but I imply copy them locally. And then I ran into this issue https://github.com/OpenZWave/python-openzwave/issues/28 .
Hi! Glad you found my post. I’m really enjoying my Multisensor with home-assistant.
You just have to run a
git checkout python3to get the python3 branch of my python-openzwave branch. Then rebuild. I fixed that bytes vs. string issue with this code, which is still an open pull request on the main python-openzwave repoAlso, you’ll find the config files you’re looking for in your build directory after running those build commands under
./python-openzwave/openzwave/config. In my home-assistant config file, I just point to that one instead of the one in/usr/Nice setup. I just getting started myself with HA on a rpi2b+ using z-wave (AEOTEC USB Z-Stick GEN5 and a ZHC5010 wall switch). Han can send commands from HA to the switch, but I haven’t been able to catch events i HA from the switch yet!
Do you install the python-openzwave on the same machine (pi) as HA or on a other machine.
Thanks! Sounds like you’re well on your way. You want HA to trigger events when you press the wall switch? That should work. Is it just not responding at all when you switch it?
I python-openzwave on the same machine as HA. HA uses that module to communicate to the z-stick so it has to be available there for it.
Everything is on the same RPI. I’ve come so far to add the manufacturer and the device specific XML to my instance of Open-zwave (as described here: https://www.domoticz.com/forum/viewtopic.php?t=11941#p87692).
Im also able to catch events, but only on the main controller (eg. all four buttons act alike). The goal is to assign individual automations to each button.
See my post at: https://community.home-assistant.io/t/setting-scenes-on-z-wave-wall-switch-zhc5010/3847/4
Do you have any suggestions to what I am doing wrong or the path i should follow?
//Tonkin
Awww… the python3 branch, I forgot it. It works nicely, I can read all data from my Multisensor, thank you !
Another question if I may, how do you manage the display of the Multisensor on the control panel ? I have a red circle for each captor on the top of the page.
Awesome. Congrats!
To make it look better, just make a group for it like this:
Also, I customized mine to get better names and icons, and to hid the non-useful data, like this:
I think it looks awesome.
I have been trying for weeks and have been totally unable to get anything even remotely like this. In fact grouping does not work for me AT ALL. It’s just a huge ugly mess of separate sensors and since I have two Multisensors I don’t even know which room I’m seeing the results for.
Would it be possible for you to post your configuration.yaml sans any sensitive information?
Thanks in advance
I’m an idiot.. I just scrolled further down and found the config file.
I’m surely an idiot too… but where is the config file ?
My old one (probably about the time of this post) is here: https://gist.github.com/partofthething/76980bdc8622bab3c7ad
That is likely invalid now on current home-assistant in a few ways. I’ve also since broken it up into sections as I’ve gotten more and more elaborate and will try to get a more recent one posted in the future.
Ho yes, it’s nice, I love the sunglasses for the UV!
It work perfectly, thank you very much! I have to dive deeper in the documentation and code now.
Sadly even with the following:
group:
multisensor_stairs:
– sensor.aeotec_multisensor_6_temperature_2
– sensor.aeotec_multisensor_6_relative_humidity_2
– sensor.aeotec_multisensor_6_luminance_2
– sensor.aeotec_multisensor_6_ultraviolet_2
– sensor.aeotec_multisensor_6_sensor_2
– sensor.aeotec_multisensor_6_burglar_2
multisensor_office:
– sensor.aeotec_multisensor_6_temperature_3
– sensor.aeotec_multisensor_6_relative_humidity_3
– sensor.aeotec_multisensor_6_luminance_3
– sensor.aeotec_multisensor_6_ultraviolet_3
– sensor.aeotec_multisensor_6_sensor_3
– sensor.aeotec_multisensor_6_burglar_3
It still looks like this:
http://prnt.sc/cvr4dq
Any ideas as to what I could be doing wrong?
Hmm, not sure! Looks ok to me. You’re sure the multisensors are on zwave nodes 2 and 3? You can also grep your home-assistant.log file for warnings or errors about the grouping, it usually says something useful. See anything in there?
The spacing isn’t coming through on here but I’m assuming you have the indentation right. Home-assistant very recently changed the z-wave sensor names so you’ll have to update them to be something like
sensor.aeotec_multisensor_6_burglar_3_51at this point. See here for more info. You can always check the precise IDs by clicking the little <> icon in the bottom left of home-assistant. Hope it works!Thanks for sharing an awesome post….its fun doing on your own, without depending on any third party hubs.
Beginners may ref to learn about raspberry : http://besthome-automation.com/raspberry-pi-home-automation/
Hey! I’m a total beginner so I could really need some assistance here.
I installed open zwave following the instructions on the HA site. I see now that I have to install the fork mentioned in this blog post.
In ELI5, exactly what commands do I need to run? Do I need to “uninstall” the version I’m already running?
Thanks!
Hey Nick,
Question. What brand/model door sensor is that you are using?
Hi Dennis, it’s an Ecolink Z-Wave Door/Window Sensor.
Thanks for the info. Helped me a lot setting up my multisensor in Home-assistant.
How can I get the motion detection to show something useful? I’ve only seen it change between 0, 8 and 254 and with no real pattern. IE no change when I wave my arm infront of it…
Glad it helped! On mine, I only ever see 0 (no motion), 8 (motion), or 3 (vibration sensed). By default, once it senses motion, it stays in the 8 state for a long time, like, 10 minutes I think. It will then reset to 0 once the timeout is done. I went in and use python-openzwave to reconfigure the default timeout to 10 seconds, which makes a lot more sense for the various triggers and actions I use the multisensor for. You can use the Python commands I show in the post to set it in the
# set timing and stuff on multisensorsection. Set config param 3 to 10 or whatever you want.hey there,
finally i could watch your youtube video and it reaffirms what im planing to do! i just discovered HA and im really amazed about it! i was just looking for something like that motion sensor to start “smarthoming” and have a little play with it!
now im going to order a usb z wave stick and probably that multisensor!
cheers
Hi, thanks for the post. Yours is the most comprehensive thing out there describing a Pi/home-assistant/Z-Stick setup!
Could you share your whole config file, or at least a mocked up version of it, showing how the “zwave:” stanza and the individual devices are organized? The official docs are a little light describing the high level view of things. Thanks!
Hey, you’re welcome! Most of my full config file is here.
This is great. I’m waiting for the Z-Wave stick to come in the mail. I’m a bit confused on what component talks with the hue lights. You don’t mention a hue hub, so how are you interacting with the hue light bulb?
Thanks! Home-assistant interfaces with the HUE hub over the wifi network. So I just type the ip-address of the hub in my home-assistant config file and the rest is handled by the home-assistant module for HUE (https://home-assistant.io/components/light.hue/).
Ah ok, so you do have a hub. Ok great, thanks for clearing that up!
As soon as I find the time this will be my first raspberry project. Also watch the youtube vid. Cool stuff!
One question. Are there any (extra) specs on the Raspberry Pi, or is the default ‘2’ out of the box good to go?
Thanks a lot!
Regards,
Gerard.
I just have the regular 2 out of the box. Make sure it has the latest operating system from raspbian. If I did it again, I’d use a raspberry pi 3 just to make it a little bit snappier to load. Theres a 2-3 second delay when opening the webpage.
I’m not looking to do anything as elaborate as a webpage right now. I have the openzwave working my raspberry pi. I only want to use a Python script to listen for my door contacts and to report back their battery life once every two weeks. Would you be willing to share with me the openzwave commands to listen for the door contacts’ events and how to wake the door contacts to report their battery life once every 2 weeks? (I would greatly appreciate your help on this.)
Thanks!
I might be able to figure that out if I knew exactly what door sensors you had. You just want a python program that runs on a server and reports the battery of the door sensors every two weeks? What should it do when the door opens or closes? I think in the end it will end up easier just using home-assistant to do this for you.
Thanks for the quick reply. I actually looked at the examples and found the callback acts as the listener function. I have my script running listening for doors opening and closing and texting me the status changes. Since I live alone, I don’t really get that many text messages. It works great and I’m even getting the battery levels of each sensor. Thanks for posting this webpage because it got me going down the right path!
Hi,
Great article, tnx.
One question, did you find some solution for controlling IR devices like air condition, TV, STB…?
Thanks! I haven’t done IR yet but I hope to soon. Probably will just have home-assistant call external commands that fire LIRC scripts or something for starters.
Thanks much for posting your multi-sensor python code – perfect example, exactly what I needed. You’re the man now dog.
Hey ntouran, cool project! I came across it months ago, and your youtube video was among a number of resources that inspired me to fall pretty deep into the diy, open source home automation rabbit hole. So thank you!
Two quick questions:
1. Can the OpenZWave Control Panel more or less accomplish what your “Configuring the Aeon Labs Multisensor 6” script does above? After a fair amount of effort I was able to get it installed and I assume it exposes all the same device config settings. Have you messed around with this yet?
2. I am super new to this stuff (linux/RPi/HA/etc), but how would I even run your script? Is it a matter of dropping the script into the ‘Python 3’ IDLE (described here https://www.raspberrypi.org/documentation/usage/python/) modifying it a bit and clicking go? Your instructions assume a knowledge level I don’t have just yet.
Hi Joe. Thanks a lot. Glad to hear you’re in deep on home automation. Fun stuff. You’re welcome!
1. Yes definitely. I messed around with it but it kept crashing on me. It appears to be capable of doing what my code did though. Nice job getting it running, that wasn’t very easy for me.
2. The “normal” way to run a python script is to just run
python script.pyon the command line. I usually just runpythonon the command line and then enter the lines one by one because I like to poke around a bit to figure out which device I want to configure and stuff. If you knew exactly what you wanted to run, your idea of putting the lines in Python3 IDLE and running should work just fine as well.Good luck!
Hi, great stuff,
got my multisensor working thanks to you.
question though, how do you make it poll frequently using the script you mentioned above? I tried copying your script to my HASS on raspberry pi 3 installed using AIO installer and I created a file called poll.py in /srv/hass/src/python-openzwave and ran it using python3 poll.py. Is this correct?
from openzwave.option import ZWaveOption
options = ZWaveOption(‘/dev/zwave’, config_path=’/home/pi/python-openzwave/openzwave/config’, user_path=’.’, cmd_line=”)
# or /usr/local/share/python-openzwave/config if installed
# /home/pi/python-openzwave/openzwave/config if testing
options.set_append_log_file(False)
options.set_console_output(True)
options.set_save_log_level(‘Debug’)
options.set_logging(False)
options.lock()
from openzwave.network import ZWaveNetwork
network = ZWaveNetwork(options, log=None)
node2 = network.nodes[2]
print(node2.product_name) # this is the multisensor on my network. Yours may be a different node.
# get current config values
node2.get_sensors()
node2.request_all_config_params()
# set timing and stuff on multisensor
node2.request_config_param(111) # this shows the current interval (3600 seconds)
node2.set_config_param(111, 120) # set the temperature sensor interval to 120 seconds
node2.set_config_param(3, 125) # set motion sensor On duration to just over 2 minutes. (shorter and it never registers as on!)
# set reporting of power level on Aeon smart energy switches
node5.set_config_param(101,2) # send multisensor info about power
node5.set_config_param(111,20) # send it every 20 seconds.
network.stop()
Hey glad to hear!
The script above looks good as long as your multisensor really is node 2 in the zwave network. Also you might want to take out the node5 stuff unless you define the the node5 variable somewhere. Otherwise that will fail. I often go in on ipython3 and just type commands like these until I figure out which devices are on each node.
Here’s my poll.py.
from openzwave.option import ZWaveOption
options = ZWaveOption(‘/dev/zwave’, config_path=’/srv/hass/src/python-openzwave/openzwave/config’, user_path=’.’, cmd_line=”)
# or /usr/local/share/python-openzwave/config if installed
# /home/pi/python-openzwave/openzwave/config if testing
options.set_append_log_file(False)
options.set_console_output(True)
options.set_save_log_level(‘Debug’)
options.set_logging(False)
options.lock()
from openzwave.network import ZWaveNetwork
network = ZWaveNetwork(options, log=None)
node2 = network.nodes[2]
print(node2.product_name) # this is the multisensor on my network. Yours may be a different node.
# get current config values
node2.get_sensors()
node2.request_all_config_params()
# set timing and stuff on multisensor
node2.request_config_param(111) # this shows the current interval (3600 seconds)
node2.set_config_param(111, 120) # set the temperature sensor interval to 120 seconds
node2.set_config_param(3, 125) # set motion sensor On duration to just over 2 minutes. (shorter and it never registers as on!)
# set reporting of power level on Aeon smart energy switches
node5.set_config_param(101,2) # send multisensor info about power
node5.set_config_param(111,20) # send it every 20 seconds.
network.stop()
When i ran “sudo python3 poll.py” i get the following error
Traceback (most recent call last):
File “poll.py”, line 1, in
from openzwave.option import ZWaveOption
ImportError: No module named ‘openzwave.option’
Sorry and appreciate your help as I am lost. As mentioned before, I used HASS AIO Installer
Interesting. So it fails on the first line and can’t import the openzwave library. Did you try it without sudo? Just
python3 poll.py? I guess that will give the same error. I think it’s because the openzwave library is only installed in the home-assistant all-in-one Python environment so when you runpython3, it doesn’t know where to import it from. Try telling it where to look with something like:PYTHONPATH=/srv/hass/src/python-openzwave/openzwave python3 poll.py
If you can find the right location where the python-openzwave libraries are installed, then that should work. You might want to ask on the home-assistant forum or something because they’ll understand the AIO environment better than I.
Thanks for your help anyway. I will try and ask in the forum. I appreciate your time!
Just an FYI
I tried this steps to run the poll.py from the virtual environment
*Login to Raspberry Pi ssh pi@your_raspberry_pi_ip
*Change to hass user sudo su -s /bin/bash hass
*Change to virtual enviroment source srv/hass/hass_venv/bin/activate
and ran poll.py, it ran but i has different error this time.
(hass_venv) hass@raspberrypi:/srv/hass/src/python-openzwave$ python3 poll.py
2016-06-01 15:27:25.760 Always, OpenZwave Version 1.4.256 Starting Up
2016-06-01 15:27:25.764 Info, Setting Up Provided Network Key for Secure Communi cations
2016-06-01 15:27:25.765 Warning, Failed – Network Key Not Set
2016-06-01 15:27:25.765 Info, mgr, Added driver for controller /dev/zwave
2016-06-01 15:27:25.765 Info, Opening controller /dev/zwave
Traceback (most recent call last):
2016-06-01 15:27:25.765 Info, Trying to open serial port /dev/zwave (attempt 1)
File “poll.py”, line 12, in
2016-06-01 15:27:25.766 Error, ERROR: Cannot get exclusive lock for serial port /dev/zwave. Error code 11
node2 = network.nodes[2]
KeyError: 2
OOOhh you’re very close now. By doing those steps you have correctly imported openzwave library and are nearly on the zwave network. At this point you should make sure home-assistant is shut down because that error just means something else is talking to the zwave controller.
I tried restarting, still no good. same error, it is either the HASS locking the controller or something else.
Now even then if it is successful, the script needs to be run under the virtual env all the time. as soon as i got out of the virtual env, the script stopped working.
🙁 sad sad face
Yeah you’ll have to stop home-assistant after it auto-starts. I run
sudo service home-assistant stopto do this but again I am not sure how the all-in-one installer does it.It’s no surprise that the script doesn’t work outside of the virtual environment because the dependency (python-openzwave library) only exists within that environment. Outside of it you’ll always get an import error unless you compile and install python-openzwave manually.
Frankly, it’s not too hard to do this following these instructions, which definitely work on a Pi. Then the library will be installed system-wide and you won’t have to worry about the virtual environment.
Hi Ntouran
appreciate the help.
However, i stumbled upon this forum post that redirected me to aeon labs multisensor manual – http://aeotec.com/z-wave-sensor/1323-multisensor-guide.html
trial and error, it seems to be reporting more often now.
This is pretty amazing stuff. I’m new to home automation, and I’m wondering if you can comment on how stable your setup is. In other words, are there times when you find yourself without lights because of a wifi outage or something like that?
One other question. One of my goals in a home automation setup would be to use my phone to tell my RPi to execute terminal commands. I have a NAS that can only be shut down by SSH’ing in and executing a command (it runs Linux under the hood). Is there any way that home-assistant could do that? I would be super impressed if it could.
Thanks for answering all these questions!
Hi Dan. Thanks! Glad you like it.
I find my setup to be very stable at most times. I do some hacking on home-assistant and the new features I’m working on sometimes are less stable, but the lights, switches, etc. are rock solid. Even when the internet in my building died completely I was still fully functional. It’s awesome.
As for executing terminal commands, it’s a fully mature and integrated feature of home-assistant, and I use it all the time using this component. I run commands to have LIRC turn on/off my A/C, etc. Can be triggered by anything.
Best wishes!
That’s so cool!
You have me sold on home assistant.
Thanks again!
I have done some tinkering, and I really enjoy Home-assistant and the flexibility it offers.
I’m still stuck on the shell command component, though. I’d like to write a script or automation that would SSH into my NAS and tell it to hibernate. As you probably already know, SSH-ing requires multiple steps.
It seems like the HASS shell command component can only issue a single command. Is there any way to force it to issue multiple lines, preferably with a delay between them? Specifically I need to tell my Raspberry Pi to SSH into the NAS, then enter the password, then issue the hibernate command.
Thanks again for your help. This blog has been an amazing resource.
You could use a Home-Assistant script and a set of shell_commands, maybe, but if I were you I’d make a bash script that contains the commands you want it to run (maybe call it
hibernate.sh). Then have HA just run that single script with a simple shell_command call.For automated SSHing, you really should set up certificates instead of using a password. That way you don’t have to worry about entering a password or using delays, etc. There are some tutorials like this one out on the web. It’s not too bad once you figure it out, and it’s extremely convenient.
Also, see this link.
Good luck! Happy to help.
Nick, Home Assistant is great! Thanks for pointing me to it, sharing this great article/info and your XML config (email) as well! It’s working a treat on my rPi3 w/ a Z-Stick v2.
Pretty COOL!
Hi,
I think this is great. I wish i had seen this before i bought the Wink Hub 2.0. But i could still use the door sensors i bought. Do you think there would be any issues with using the Raspberry Pi 3?
Hi, thanks! This would all work perfectly on a raspberry pi 3 and I will probably upgrade soon to get a slightly faster loading web interface.
I was wondering if anyone is using the Razberry 2 module on their raspberry pi? I am trying to get HA working but having a problem adding the device. Its a Ecolink Motion Sensor, when i add
zwave:
usb-path= /dev/ttyAMA0
to the configuration.yaml but all i get is this error:
16-11-12 20:01:51 homeassistant.components.zwave: zwave not ready after 30 seconds, continuing anyway
what else do i need?
Hi,
does your configuration work with Aeotec Z-Stick Gen5?
I have tried the current home-assistant instructions (using /dev/ACM0) and this is what i see in the log :
INFO:homeassistant.core:Bus:Handling
INFO:homeassistant.core:Bus:Handling <Event state_changed[L]: old_state=None, new_state=, entity_id=persistent_notification.invalid_config>
INFO:homeassistant.core:Bus:Handling
INFO:homeassistant.bootstrap:Setting up sensor
If there is any light you can shed on this … please do.
Thanks
Yes, I’m using that exact stick. Note that the blog post was written a few months ago and Home Assistant has changed configuration details for a few things so my configuration there probably won’t work exactly. I’d look for more info in your log because that messages basically just says there’s invalid config somewhere. There should be another log entry about exactly what is invalid about it.
Nice video, I’m about to set up something similar (home assistant, zwave, hue…)! I guess I know the answer but… did you keep the hue bridge or did you manage to get rid of it?
Thanks!
I’ve kept it so far. Good luck!
Hello good afternoon.
Are there any other hardware alternatives of the Aeotec Z-Stick Gen5?
How did you manage to get the camera shown with an icon like that? https://partofthething.com/thoughts/wp-content/uploads/2016/01/control-panel.png
(top left corner).
I want to do the same, but Home Assistant wont allow me, I am only able to view it with the preview of the video.
Please explain how you did this!
That’s an old version when the camera could be a “badge”. I think it’s no longer supported, sorry!
How much time did it take for u to build the one you showed in video?
Oh I dunno, it was an ongoing process on and off for a good month to get that all set up like that. Just depends how much time per day you wanna spend, I guess.