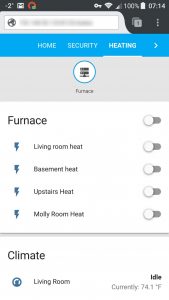
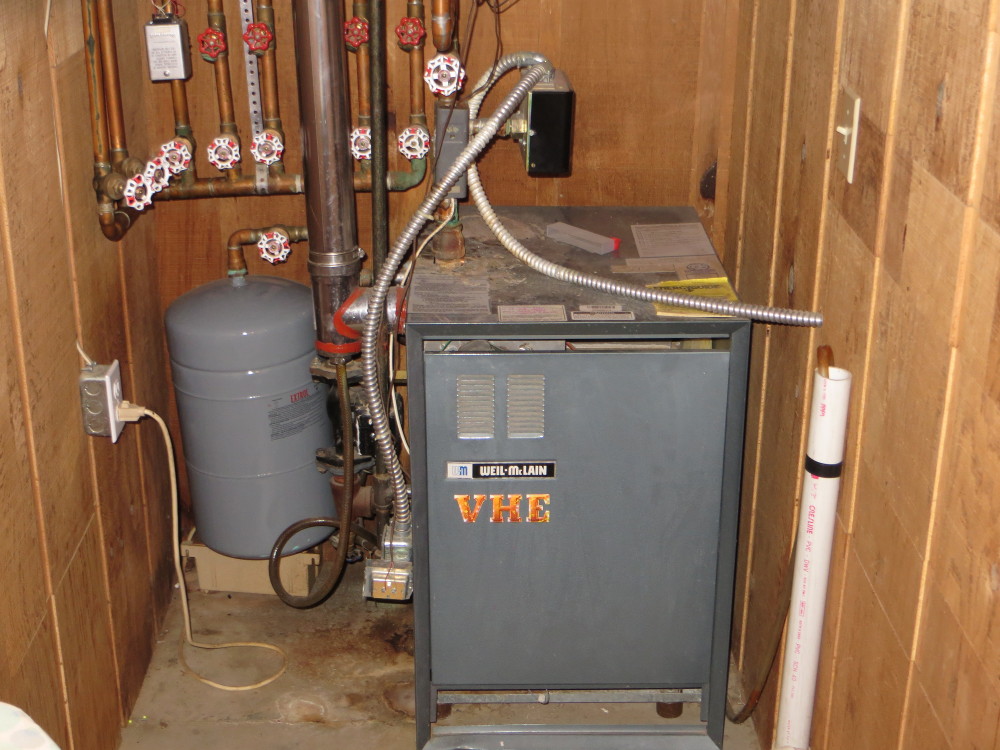
My mom has one of those on/off furnaces (EDIT: actually it’s a boiler) that heats up water and circulates it through pipes around the house that have little radiator fins. She wants it to turn on before she wakes up so it’s not so cold in the morning. In this post, I explain how to turn a normal furnace into a smart furnace controlled by Home Assistant for only a few bucks.

Starting point
I already had a Raspberry Pi 3 running Home Assistant for some basic home automation stuff around the house (a few lights, cameras, door sensors, temperature, ham radio, motion sensors.. see my earlier posts in this category). This can be set up pretty easily. I also have an OpenVPN server installed on the home router (using DD-WRT), allowing easy remote access to the LAN.
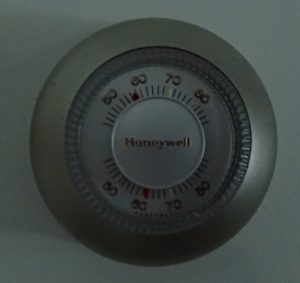
The furnace is as simple as it gets. There are like 8 zones each controlled by a two-wire (red and white) Honeywell mercury thermostat.


Physically Controlling the Furnace
When one of these thermostats gets cold, mercury flows downhill and connects the two wires, which are hooked up to a 24V transformer that actuates a water valve (for example, the silver box in upper left of above photo). The water flows and the heat turns on. Again, this system is heat only so it’s as simple as it gets. To take control of it, all I need to do is be able to control a relay that connects the two wires. I could put a relay and temperature sensor in the wall near each thermostat and run some wires to control them, but it’s easier for me to put all the relays together by the furnace and rely on wireless temperature sensors.
But how to control the relays? I don’t want to have a dedicated Pi down there for run a bunch of wires. Enter… the ESP8266.
The ESP8266 is an incredible little System-on-a-Chip (SoC) that has a WiFi radio and can be programmed just like an Arduino. It has libraries ready to go for message passing (MQTT) to tell it when to flip switches, Over-The-Air updating so I can upgrade the system without plugging it into a computer, and tons of other stuff. It also has 16 GPIO pins, many of which are available for the user in most packages. And it’s just a few bucks! (Note that the ESP32 just came out that has Bluetooth too). I got one packaged as a Wemos Mini D1 because it came with a USB interface, making it easier to deal with for a few extra dollars.

On the other end of these relays, we simply patch into the contacts of the red and white thermostat wires from each zone we want to control. The original thermostats stay where they are, and the system reverts to normal old behavior when the relays are off.
MQTT for communication
MQTT is perfect for this kind of application. It’s an IBM-developed simple messaging protocol originally intended to control pipelines and stuff via satellite. It offers publish and subscribe services, which is exactly what we need. The ESP8266 will subscribe to a few topics and turn relays on and off according to what it gets and Home Assistant will publish commands based on user input or automations. MQTT also has a “last will” feature where the ESP8266 can tell the broker to send an “unexpectedly offline” message if it ever gets disconnected, which I use to send myself an email if the power at home goes out or if something else breaks. The PubSub library (among others) adds MQTT capabilities to the ESP8266.
I have an external MQTT broker on a server but you can alternatively just use the built-in MQTT server on Home Assistant or install one locally on your LAN. I like the external one because it will tell me if the house goes offline.
The ESP8266 Code
My code is posted here. It has “secure” MQTT (encrypted but not verified), and allows OTA updates from the LAN. Note that there are a lot of things that can go wrong (i.e. the furnace can stay on if this loses connection after it turns on) so use at your own risk! I assume no liability if this damages your property. It should be monitored and adjusted carefully while you work out any kinks.
Home Assistant configuration for smart furnace
Home-Assistant does all the User Interface and Intelligence. You just have to configure it. The generic_thermostat component is perfect for this.
Relevant bits of my configuration are as follows:
|
1 2 3 4 5 6 7 8 9 10 11 12 13 14 15 16 17 18 19 20 21 22 23 24 25 26 27 28 29 30 31 32 33 34 35 36 37 38 39 40 41 42 43 44 45 46 47 48 49 50 |
mqtt: broker: !secret remote_server port: !secret mqtt_port client_id: mom-ha keepalive: 60 username: !secret mqtt_user password: !secret mqtt_pass certificate: /etc/ssl/certs/DST_Root_CA_X3.pem protocol: 3.1 birth_message: topic: 'mom/status/hass' payload: 'online' qos: 1 retain: true will_message: topic: 'mom/status/hass' payload: 'offline' qos: 1 retain: true switch: - platform: mqtt name: Living room heat command_topic: "mom/furnace/livingroom" state_topic: "mom/furnace/livingroom" payload_on: "1" payload_off: "0" qos: 1 retain: true - [more switches...] binary_sensor: - platform: mqtt name: "Furnace" payload_on: '1' payload_off: '0' state_topic: "mom/status/furnace" sensor_class: connectivity climate: - platform: generic_thermostat name: Living Room heater: switch.living_room_heat target_sensor: sensor.multisensor_temperature min_cycle_duration: minutes: 5 tolerance: 0.2 target_temp: 63 min_temp: 40 max_temp: 85 |
With those components in place you just make a few simple automations to turn the heat on in the morning and off at night.
|
1 2 3 4 5 6 7 8 9 10 11 12 13 14 15 16 17 18 19 20 21 22 23 24 25 26 27 28 29 30 31 32 33 |
- alias: Heat on in morning trigger: platform: time at: "07:15:00" action: - service: climate.set_temperature data: entity_id: climate.living_room temperature: 73 condition: condition: and conditions: - condition: numeric_state entity_id: sensor.dark_sky_temperature below: '55.0' - condition: template value_template: '{{ states.climate.living_room.attributes.temperature < 70 }}' - alias: Heat off at night trigger: platform: time at: "22:30:00" action: - service: climate.set_temperature data: entity_id: climate.living_room temperature: 62 condition: condition: and conditions: - condition: template value_template: '{{ states.climate.living_room.attributes.temperature > 68 }}' |
To get some basic morning pre-heating intelligence going on, this is totally sufficient. Exciting times!
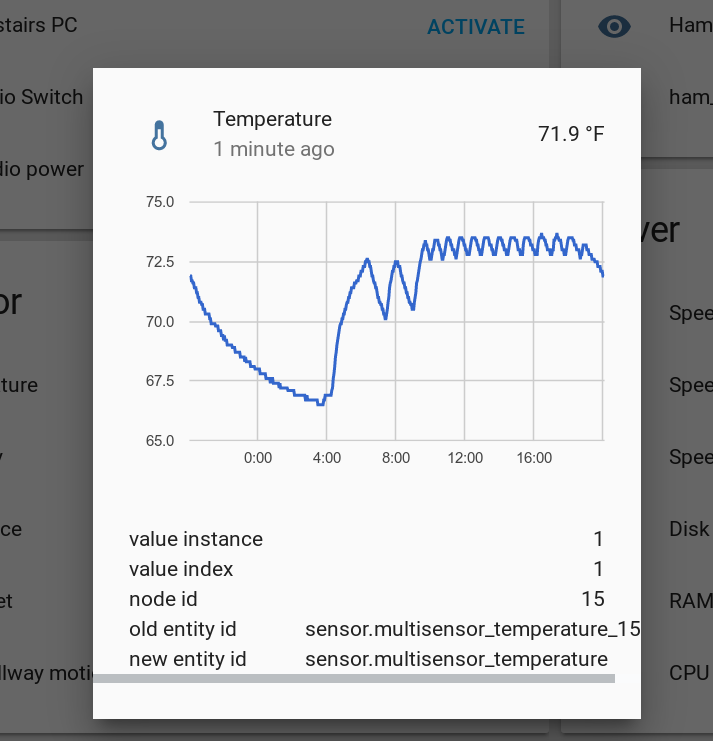
Here it is in action over a day:

As a general tip for people like me that might be searching for this, what you are controlling is a boiler, not a furnace.
I plan to do a very similar setup. Where are you getting the power for the board? Did you plug and just plug in an adapter, or are you converting down the 24v AC from the transformer near the boiler?
You didn’t include what you’re doing with the original thermostats. It seems like it would be pretty easy to pick up that side of the wiring as well. Did you do, or do you plan to do this?
Thanks for the feedback! I mentioned “boiler” at the top now. Yeah, the ESP8266 and relay board are just powered through the nearby wall AC outlet through a standard phone-charging microUSB wall-wart. The original thermostats stayed where they were so the system reverts to “regular old” mode when all relays are turned off (I edited the description above to clarify this).
Do you have the part number of the relay module you used, and could you give additional info on how you wired the ESP8266 to it?
Thanks!
It just says “4 Relay Module” on it. It’s one of those optoisolated ones. Here’s the exact model.
For wiring it, I applied +5V to the VCC pin, GND to the GND, GPIOs D4, D5, D6, D7 to the relay inputs (those are Wemos numbers; actual ESP8266 GPIO numbers are 2, 14, 12, 13). Importantly, I jumpered the VCC and VCC-JD pins (this powers the coils with the same +5V coming in over the USB cable from the wall outlet).
hello is it possible to add 4 manual buttons to this project. I want to use this project to control my room lights.
Sure. You just need buttons that can trigger the MQTT messages that will in turn flip the relays. I use an old IR remote control from a TV with a $2 IR receiver for things like this because that’s the cheapest, but you can also wire buttons right into the Pi or use other wireless buttons of some kind.
Hi there, my 12 year old son is looking to do a raspberry pi project that controls our heating (help!). Being a relative neophyte to coding, does your setup work without him wiring into our thermostat? We have a wireless Drayton Digistat RF701 Thermostat. Any help gratefully received!
Hi Sarah, I checked out your thermostat and I can’t tell exactly how one would control it from a raspberry pi. So I’m afraid I’m not sure how to help your son out. One good place to start would be to just hook the pi up to a temperature sensor of some kind and read what the current temperature is. He could have it ding or blink a light when he thinks its time for the heater to turn on and off and maybe that could be later expanded to actually flip it on and off. That extension may require wiring changes though.
does the esp8266 that we see plugged into the relay board need a separate board to program it? or can we plug it directly into a pc?
Many ESP8266s, including the one in this post, come packaged on boards that have a micro-USB port and some memory and other stuff. The ESP8266 itself is just a chip so you can get it alone without any of these things.
Using a Raspberry Pi to automate an old furnace is a clever and cost-effective solution. What are the main benefits of integrating a Raspberry Pi with your home heating system?