I decided I wanted a network-attached storage (NAS) server because I needed some central and safe place to put all my big files. I’ve been using more and more hard drive space because I’ve been taking photos in RAW and collecting more digital video (camera, dashcam, digitized home videos from the 1990s, and drone). I also just enjoy fiddling with servers and stuff and thought I could use a home server for a variety of other things. My raspberry pi has been doing well for my home automation but a bigger server might make it faster. I’m trying to learn Blender and have been eyeing a Machine Learning course. Both of those require a nice modern GPU. Finally, I just enjoy learning things about computers.
Choosing a storage technology
I wanted some redundancy in my storage, so if a hard drive fails in 6 years I don’t lose all my data. A good off-site backup schedule is the best way to handle this, but that’s kind of hard and I wish it were more automated. I considered the following options:
- RAID5: This takes three hard drives in an array and reads/writes to all of them at once (called striping) so they’re super fast. It also writes error-correcting info so 2 of the drives are usable and the third is backing both up. If any dies, the data lives on. These are great for people who want to survive hard drive failures AND have zero downtime (enterprise people mostly). RAID6 is this but 2 drives can fail at the same time.
- RAIDZ1/RAIDZ2: These are like RAID5 but using fancier ZFS technologies that my cousin who’s a system administrator said is super badass a few years ago.
- RAID10: Striping and mirroring. This is 2 sets of mirrored drives (4 drives total) that gives you the performance of striping with the redundancy of mirroring. You et 50% of the space and need at least 4 drives.
- ZFS mirroring: Just reads/writes everything to two disks. Improved read performance, slower write performance. Also has lots of fancy ZFS features like auto-snapshots. You get 50% of the capacity.
I decided to just do ZFS mirroring because I only wanted to buy 2 drives for now. If I upgrade later I can migrate the whole thing to RAID-Z1. I just really wanted to try out this ZFS business.
Choosing components
First step was choosing a motherboard and processor. My niche is a combination of serious but power-efficient NAS with goofing around with GPU stuff. So I was looking for:
- Better specs than my 2011 laptop (since I wanted an upgrade if I was going to spend money), which has 8GB RAM and an intel i7-2760QM CPU @ 2.40GHz
- ECC RAM capability (With ZFS lots of people say you should buy error-correcting RAM because if there’s a RAM misfire during some RAM-intense ZFS operations you can lose the pool. )
- 4+ SATA ports (since it’s a NAS, it needs ports for the hard drives)
- Small, quiet, and power efficient (since I live in a small apartment)
For a CPU, I was surprised that my 2011 laptop CPU is still doing pretty well with a Passmark score of 6,619 and a power rating of 45 Watts. The speeds really have kind of slowed down in growth.
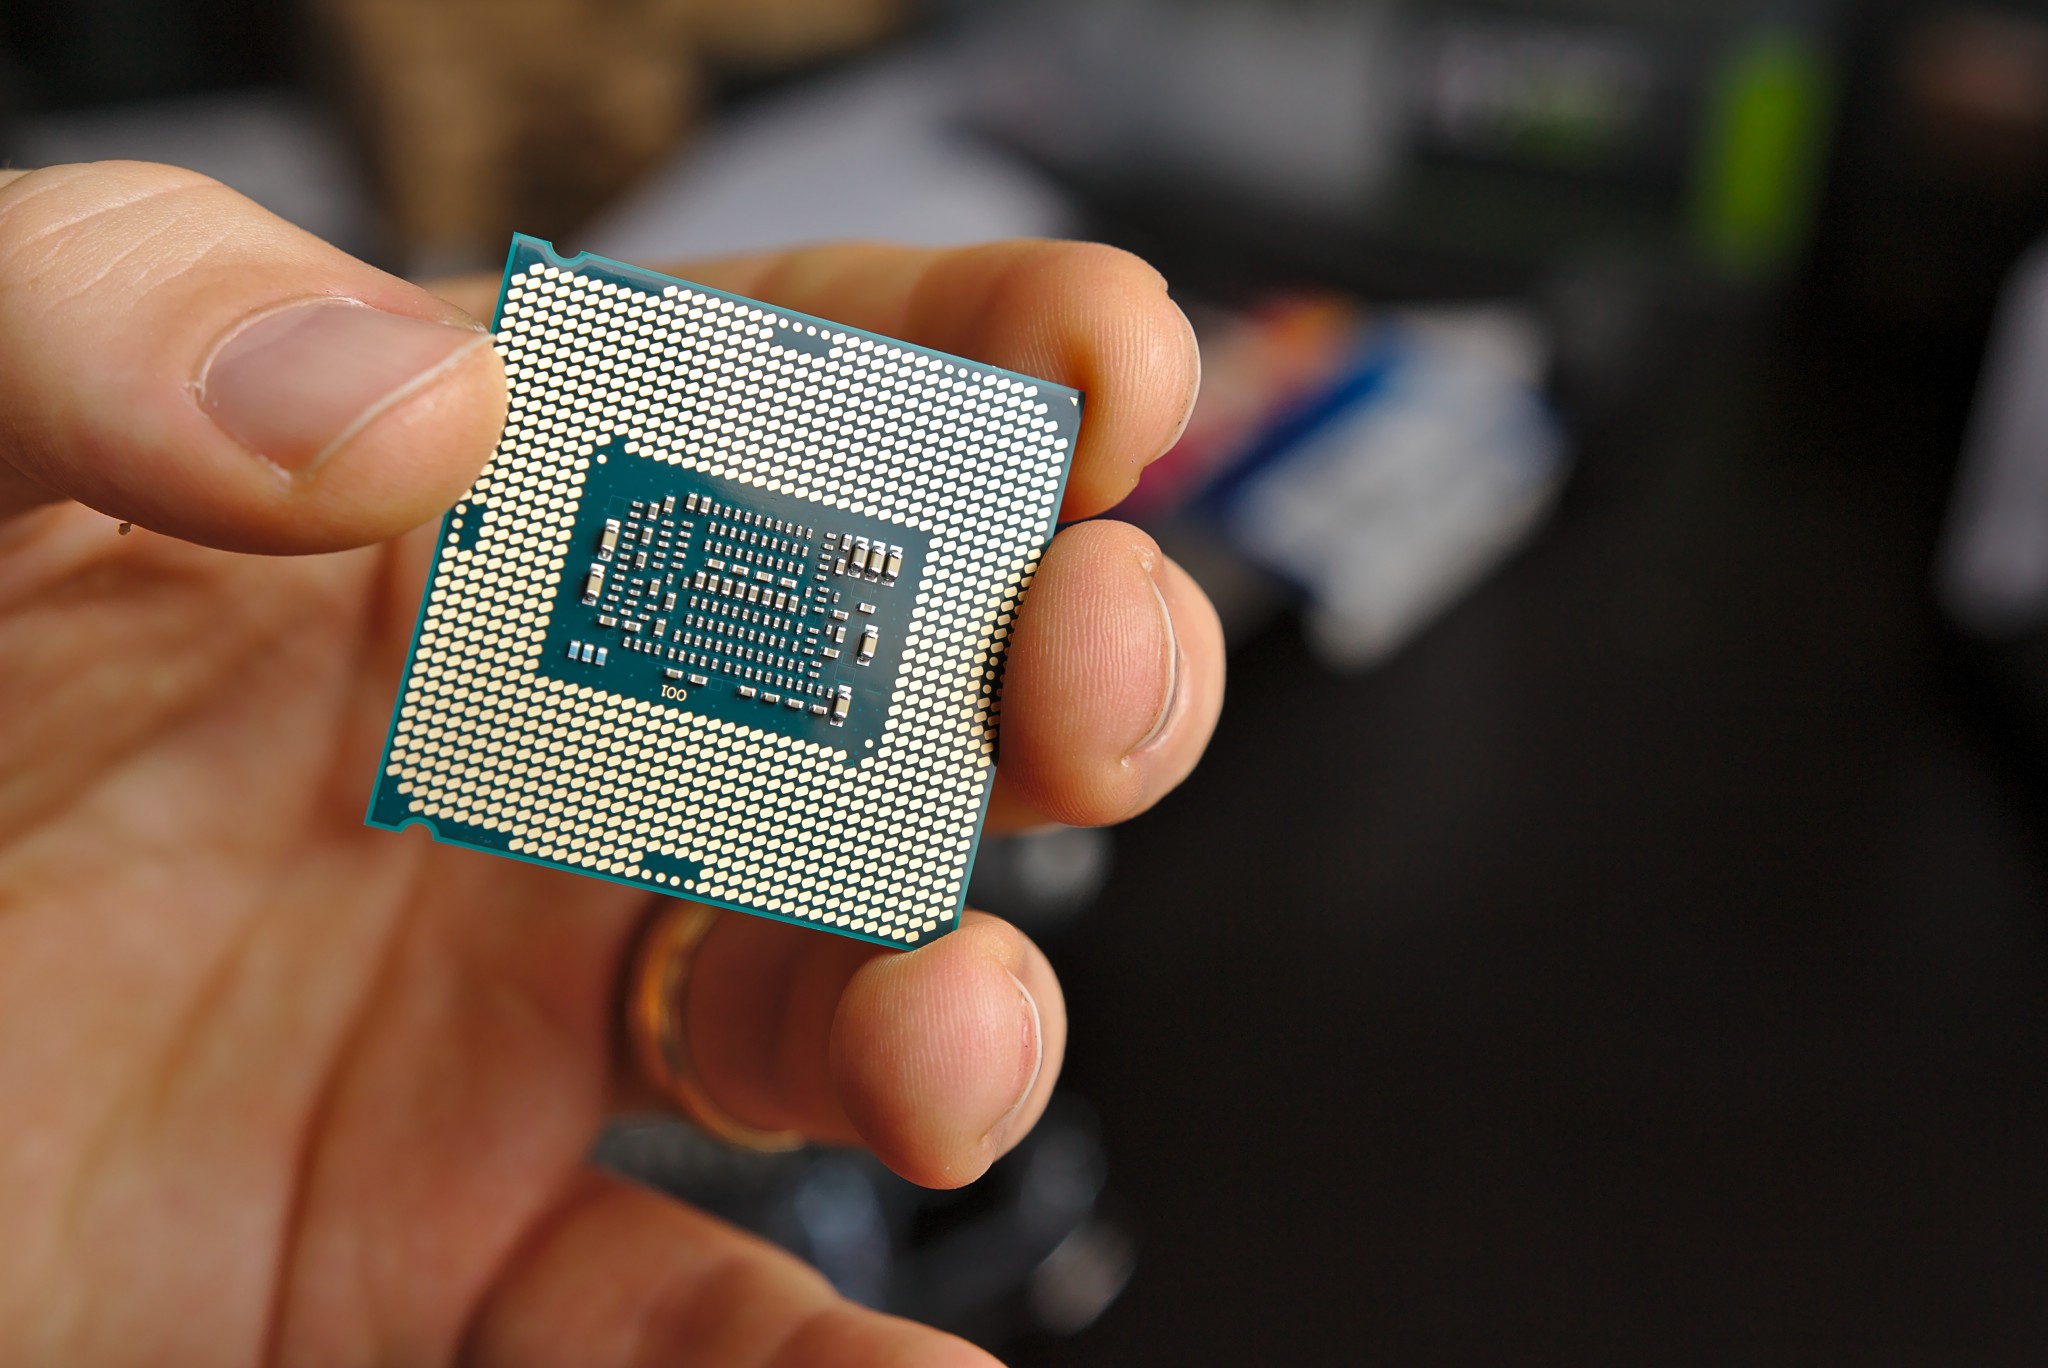
For size, I decided Mini-ITX form factor was right. Most motherboards of this size that support ECC RAM are pretty pricey and take power-hungry Xeon processors. This guy got a $1000 board, which is badass but I was hoping to stay a price range below that or two. After a very long time of searching and weighing options, I decided that probability of non-ECC RAM errors is low and just went with regular RAM. I found a nice 25W processor that gets a 9400 Passmark (Intel 7700T). During this search, I found the wikipedia lists of i7 processors (and the i5, i3s too) very useful. It appears that for ECC RAM support you either need a slowish i3 or a super-expensive and powerful Xeon. The i3-7100T is a solid low-power contender but I just couldn’t stomach buying something slower than my 2011 laptop because I wanted this thing to triple as a Blender renderfarm.
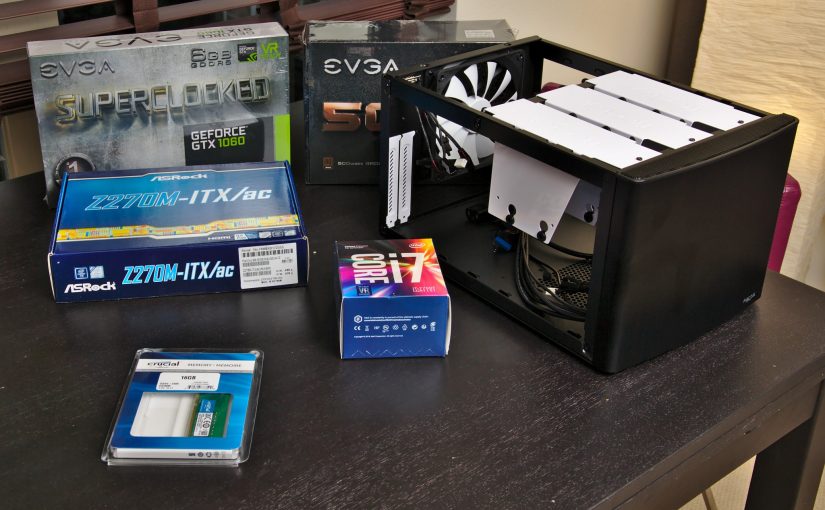
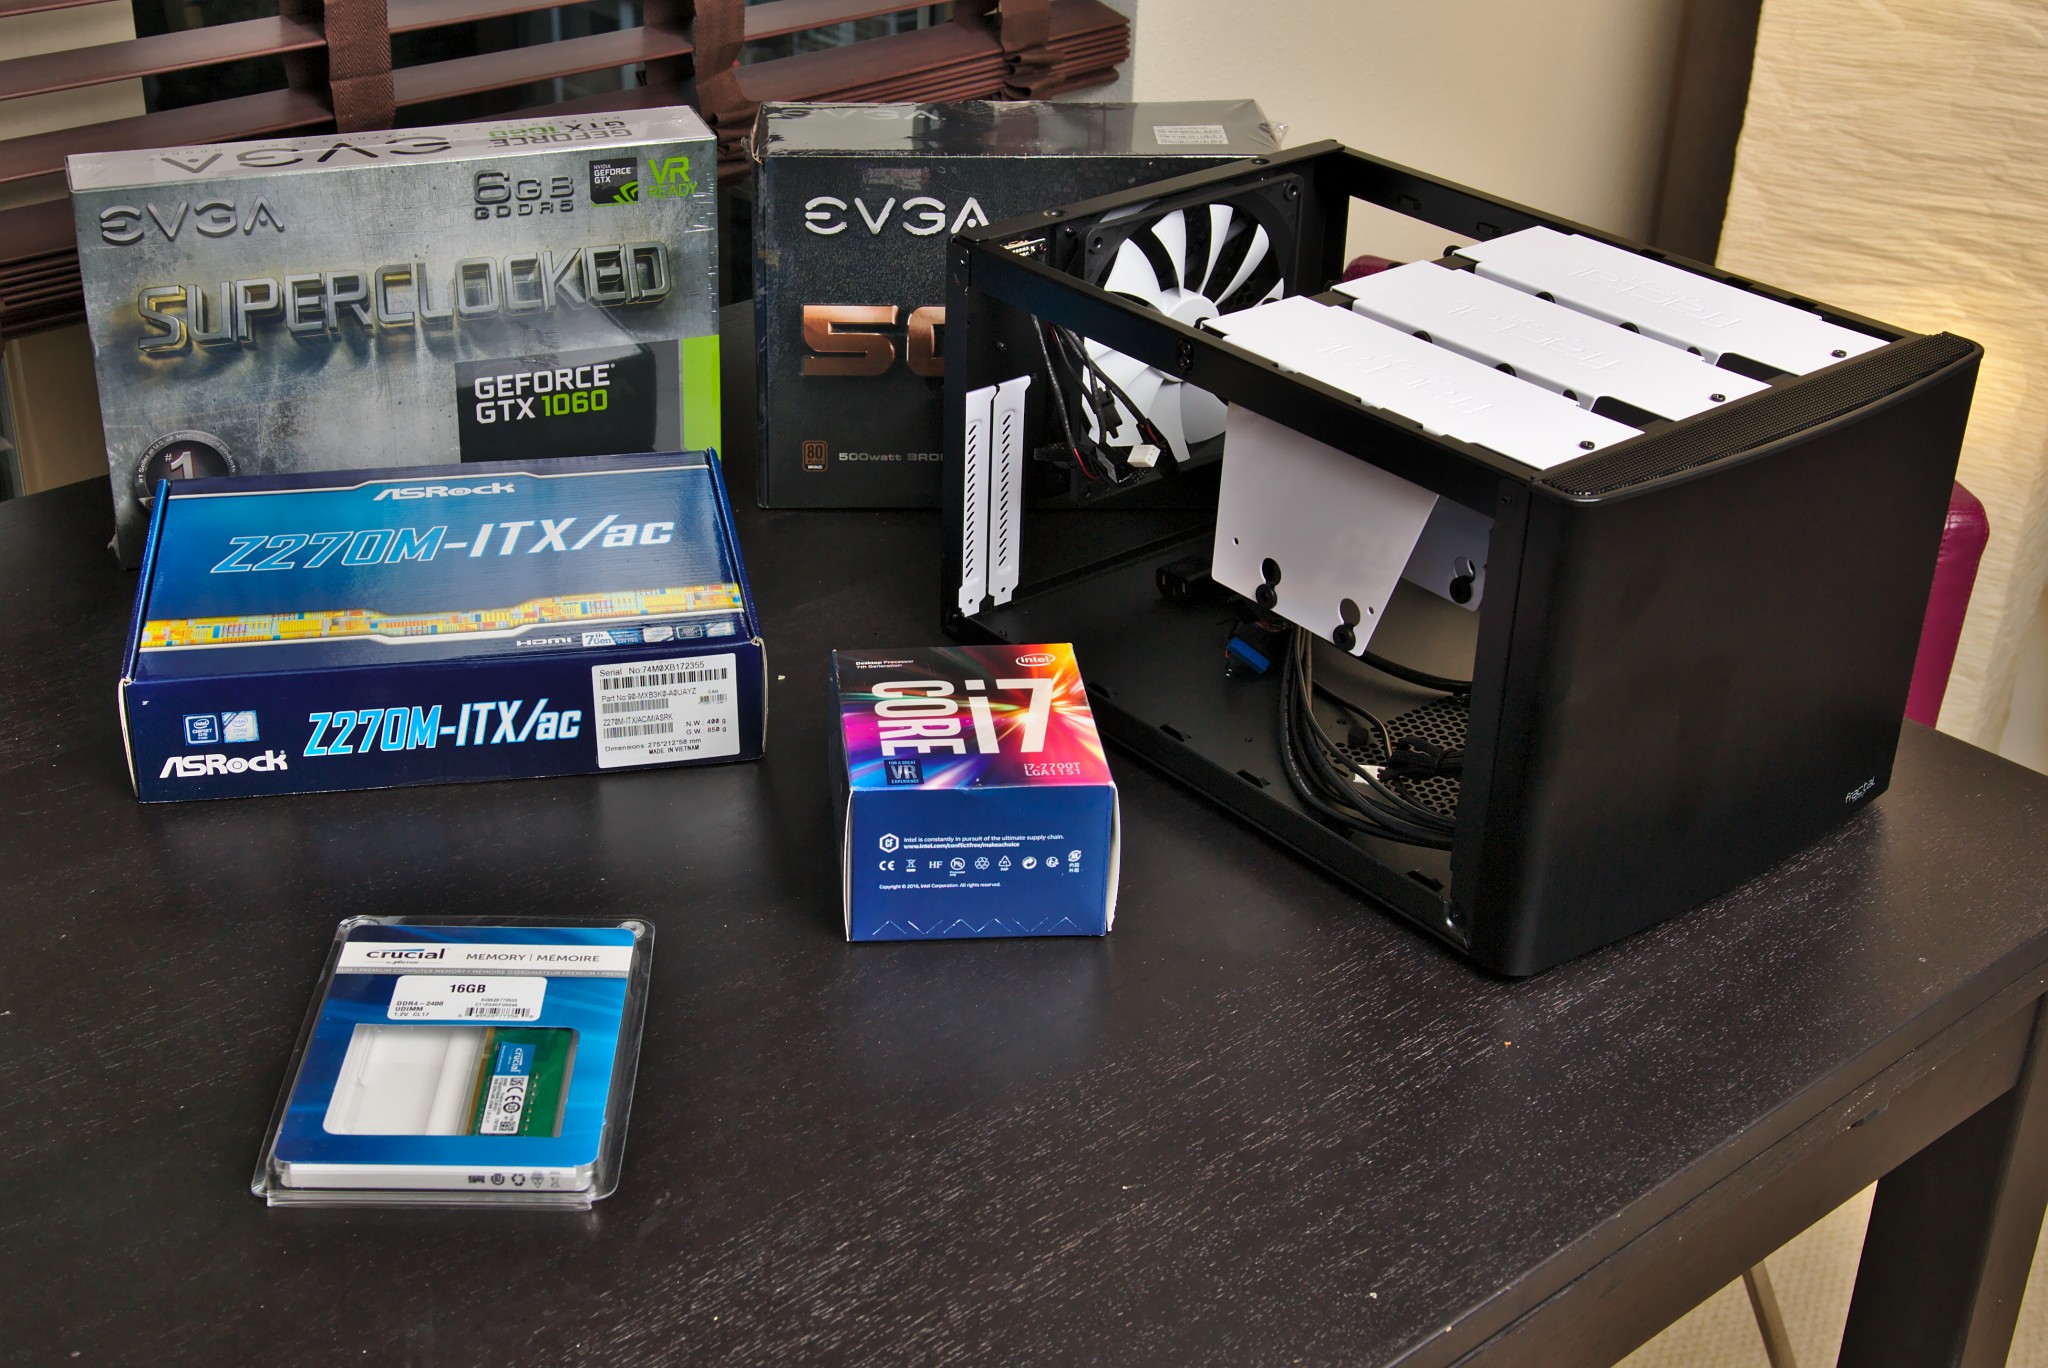
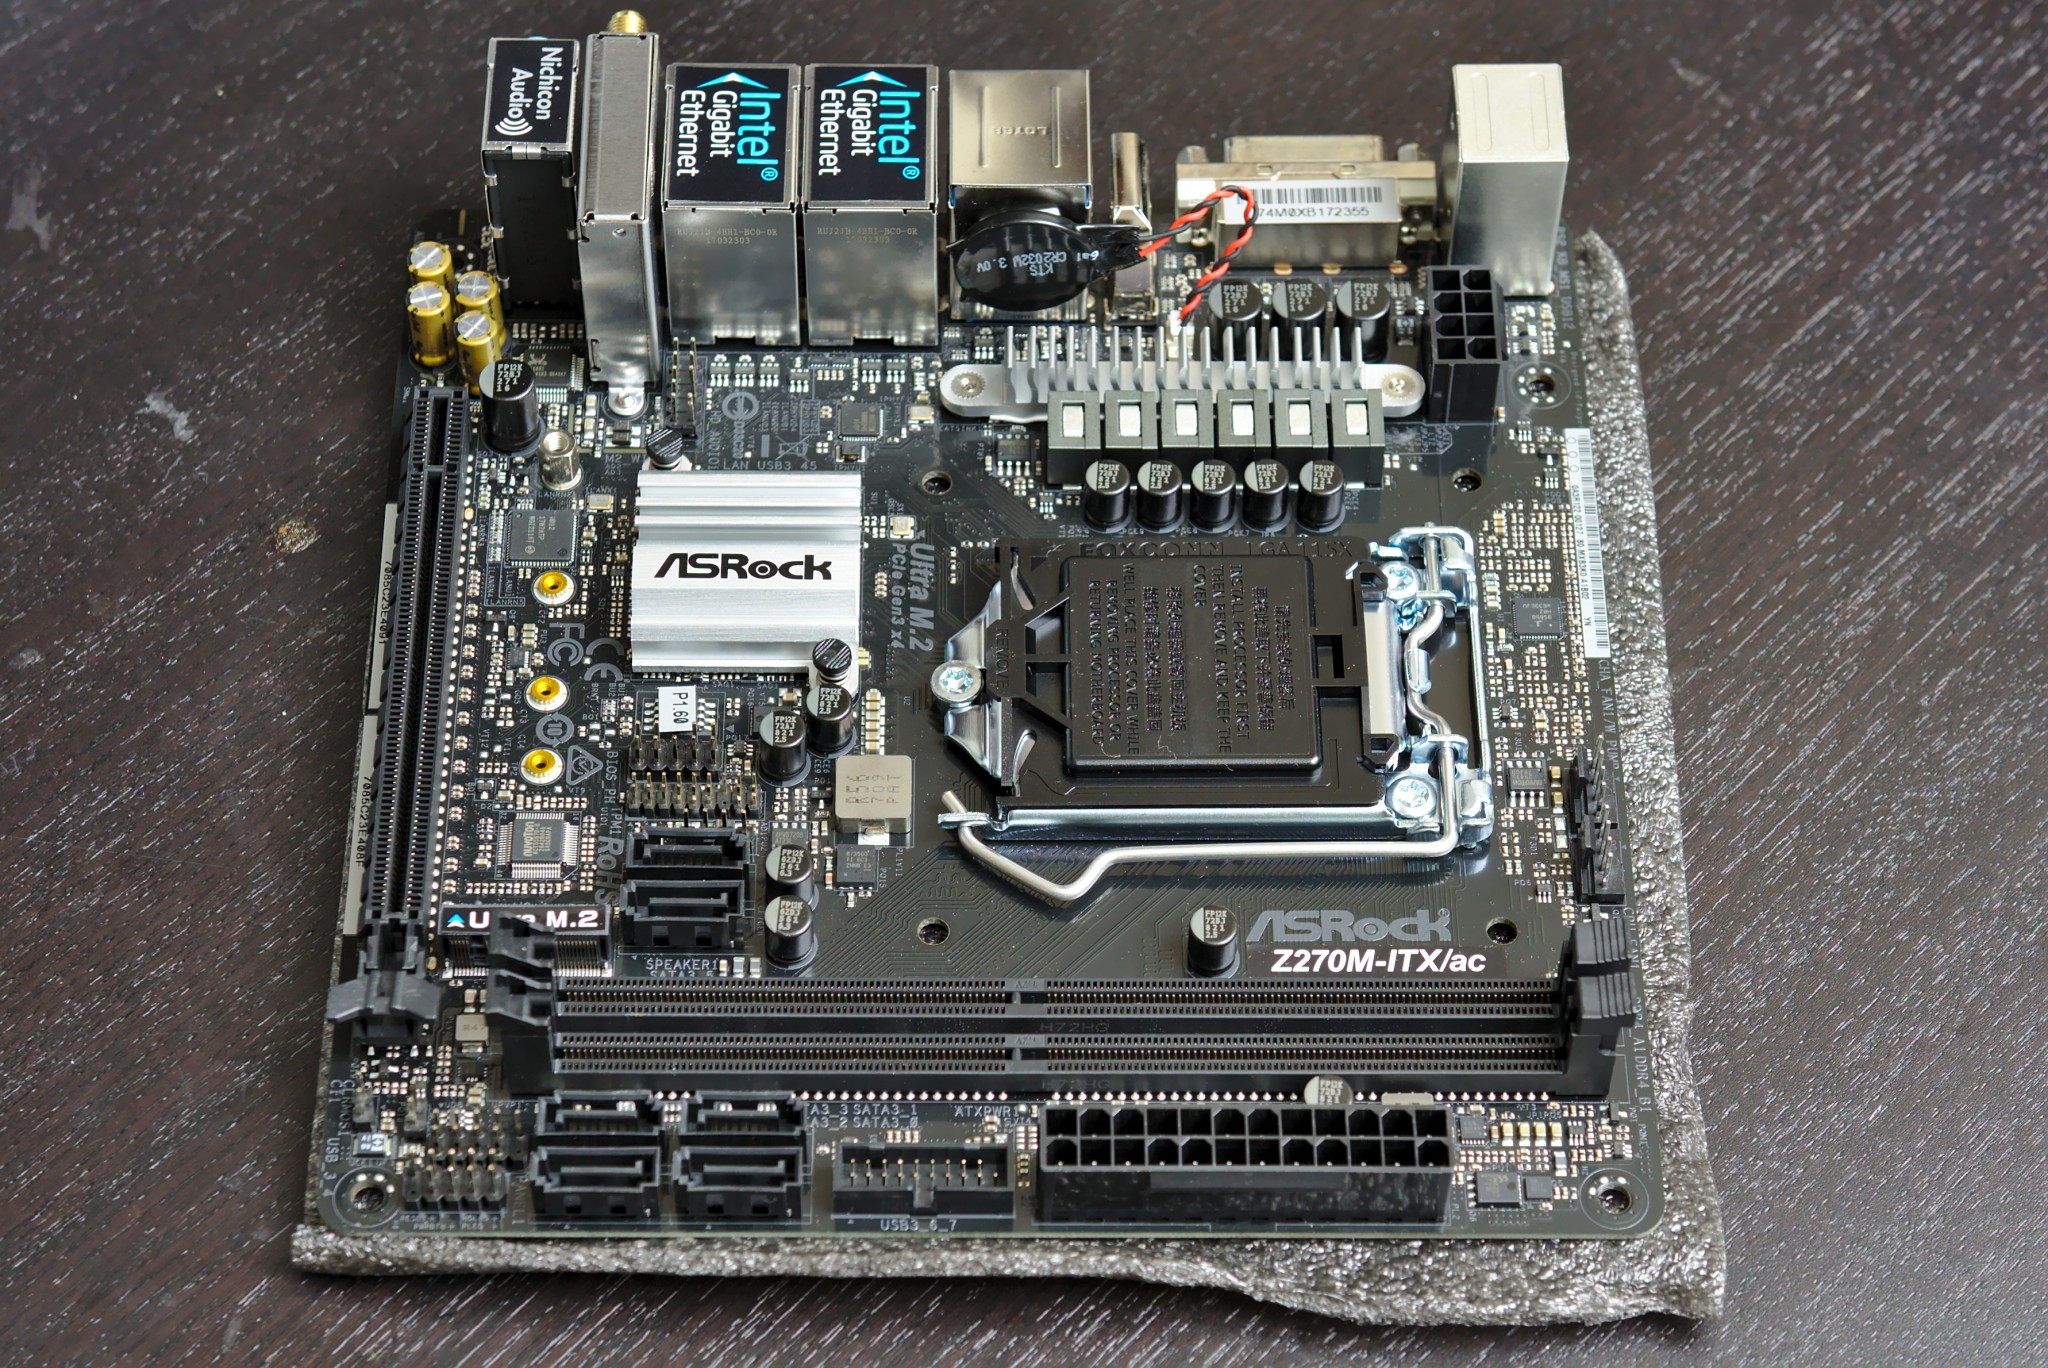
I found an epic board that had all the bells and whistles I wanted: the ASRock Z270M-ITX/ac. Not only does it have dual gigabit LAN but it also has wifi, so I can make a neighborhood upsidedown-ternet if I want, long a dream I’ve had.
For cases, I found the Fractal design Node 304 which was nice in that it was small and had room for up to 6 hard drives. Nice!
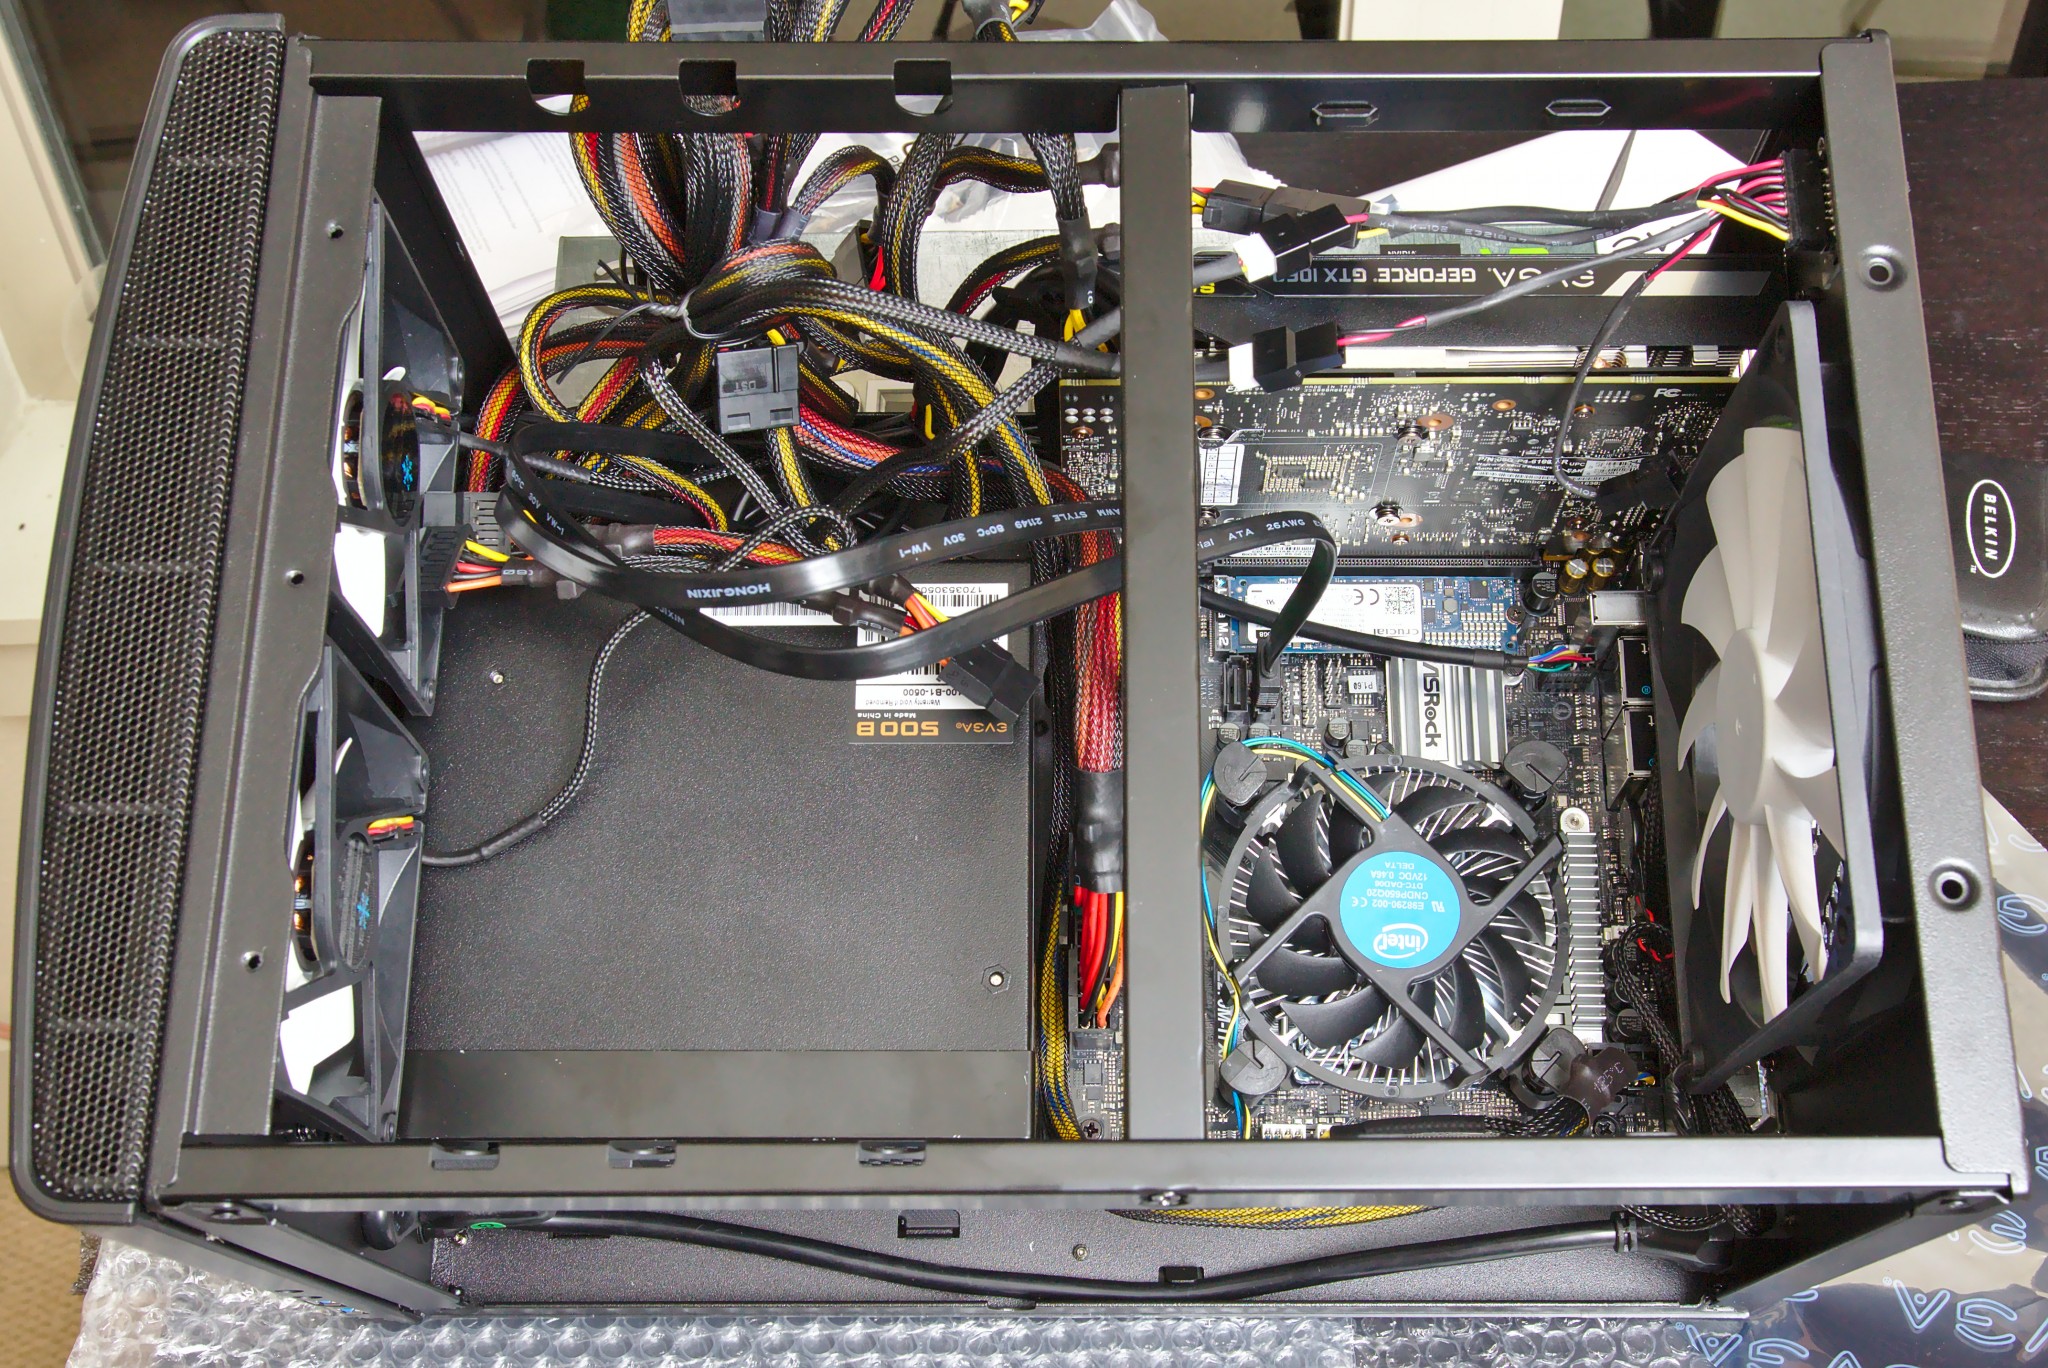
For hard drives, I went with two Red series Western Digital 8TB NAS drives. They’re spinning platters but are low-ish power and are spec’d out to last forever. I also discovered that there are now these things called M.2 ports on motherboards that you can plug little tiny SSD hard drives into for your operating system (last PC build I did was in 2002). So I grabbed a 500GB SSD for that.
For Machine Learning, I knew I wanted a nVidia drive since they have CUDA and that seems to be used by most of the libraries I’ve looked at. I found a lot of nice webpages where people basically said that The nVidia 1070 with 6GB was fine for learning and up to medium-sized real problems, though for large practical problems it may struggle a bit. Since my goal is mostly to learn some ML I figured it was a perfect middle-of-the-road compromise. I was also wary of getting too much of a beast since I want this to be sort of a contradiction: cheap, low power, and powerful/future proof.
Building was pretty easy. When I turned it on at first it didn’t bring up the screen. I had it plugged into a TV monitor through one of the motherboard HDMI port and tried switching it around. Eventually I discovered that it had to be in the nVidia GPU (bios gives it preference by default) and that the TV had to be plugged in when the PC booted. Up came the bios and I was a happy person.
Power consumption
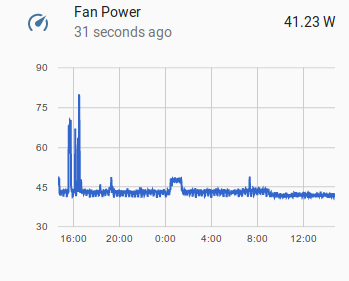
I knew I was going a bit overboard on power consumption when I got the GPU but I wasn’t sure how bad it would be. My two WD hard drives came a few days after I put the original parts together and I was happy to see a 25 Watt idle power consumption without them. When they came and I added them, I got a 40 Watt usage when this thing is under light load, peaking around 70 Watts. At 11 cents/kWh, that’ll cost $40/year to run continuously, compared to $5/year for my Raspberry Pi. Not too bad, but maybe I’ll let the Pi keep running the home automation system for now and turn the NAS on when needed.
Operating system, ZFS, and NFS setup
There are some great choices to make your NAS system easy to administer such as FreeNAS. Most people will enjoy using that. Personally, I’ve been avoiding pre-built applications like this because I like fiddling around a a lower level so I know how everything works. Of course, if you don’t like spending hours learning this crap, then don’t bother! I went with Ubuntu 17.04 which like most linuxes has ZFS and NAS and Samba and all the good stuff. I installed it via a USB drive and installed all my favorite programs, set up SSH, got the nVidia proprietary drivers, and we’re off.
Getting the ZFS mirror up and running was trivial. Once I figured out what my 8TB drives were called, I ran:
|
1 |
$ sudo zpool create pool mirror /dev/sdb /dev/sdc |
Sharing it over NFS on my local network is nearly trivial as well:
|
1 2 |
$ sudo apt install zfsutils nfs-kernel-server samba-common-bin $ sudo zfs set sharenfs="rw=@192.168.0.1/24" pool |
Neat! On my client PC I just mounted it with (1.156 is the NAS server IP address):
|
1 |
sudo mount -t nfs 192.168.1.156:/pool /mnt/pool |
And then I started filling it up. I plugged my laptop into my Gig ethernet port with a hard-wire and copied over 500 GB of stuff. It was fast! Sweet! For Windows sharing, I’ll have to set up Samba eventually if my wife wants to join in on this fun. For now NFS is enough.
I learned about ZFS snapshots and they blew my mind. It’s like version control for your hard drive. So if you delete everything, you can just roll back.
|
1 |
sudo apt install zfs-auto-snapshot |
It was at this point that I started wondering about permissions and user management. How can I control access among the PCs on my local network? As it turns out, NAS by default just does UID matching, so if user nick has UID 1004 on the server and user sketchy-friend comes by and hooks up to my wifi and sets his UID to 1004 as well, then NFS will serve him files as if he were I. This is fine for a home usually unless you have capable teenager hacker children. NFS4 supports Kerberos encryption so I’m going to have to figure that out too and see if I can get it working since it seems a bit more robust.
Remote access/headless options
So, how to remote control this thing? Obviously SSH works fine for text-based management, which I’m used to on my webserver and at work. But I want some GUI action on this guy, specifically:
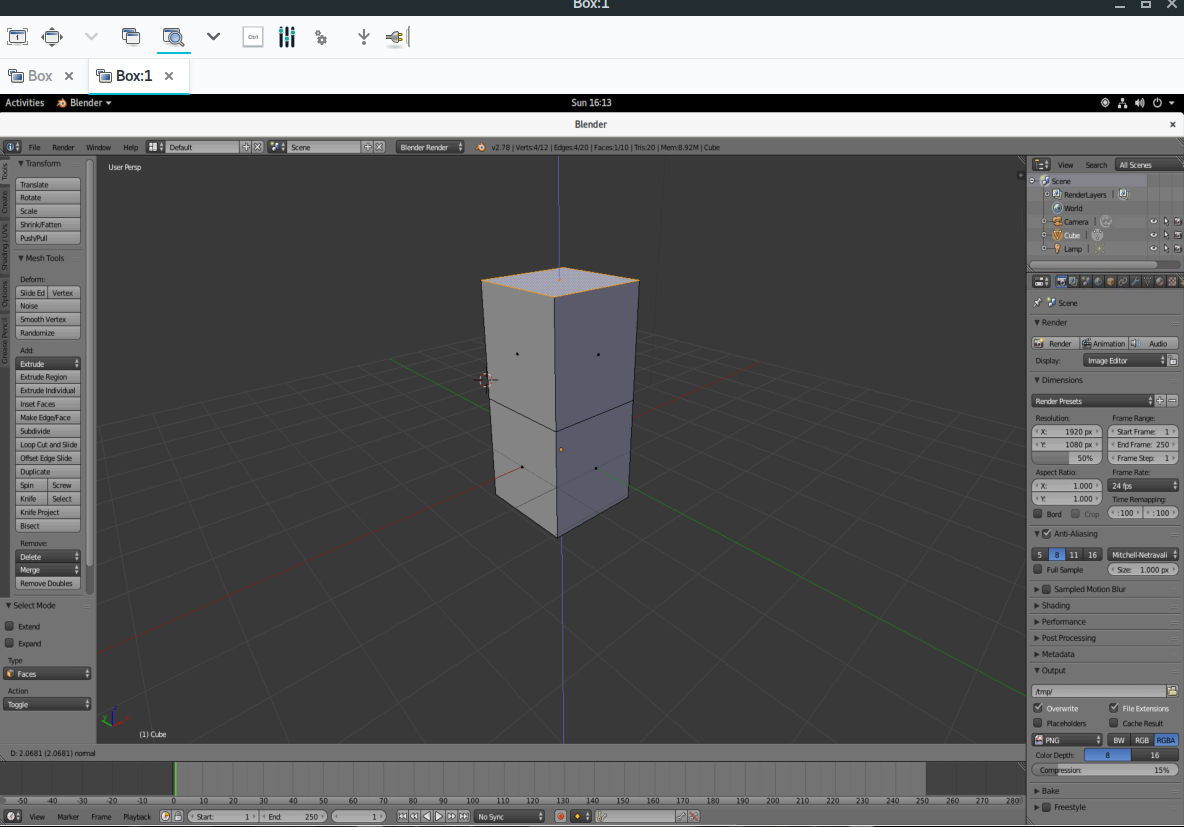
- I’d like to run Blender on it remotely so I can take advantage of the nice GPU and faster processor
- I’d like to run Darktable remotely so I can manage and process my images and have them be accessible everywhere on the network
- I’d like to control the screen and get it running movies or netflix or games on the TV that it’s plugged into as a media server
Darktable (and many other programs) is easy, just ssh in with -XC or -Y to forward X graphics and run it from the command line. It pops up on the client PC and works great.
For the rest, there are plenty of problems. If you try to run Blender with X forwarding, you get:
|
1 2 |
X11 glXChooseVisual() failed, verify working openGL system! initial window could not find the GLX extension |
Turns out 3D hardware acceleration doesn’t transfer over X too well. This is the same problem you get if you try to run Gnome3. Well maybe I can get VNC to work. I read all about this remote access X thing called XDMCP and had trouble getting it to work. After struggling forever I found the following out:
Setting up remote access of the GUI
First thing is first. The computer booted and no one is logged in. How do we get a GUI going remotely. To get remote access to the GDM3 login screen, I did this:
- SSH in to the machine.
- Configure GDM3 to let you connect remotely in
/etc/gdm3/custom.conf:
12345[security]DisallowTCP=false[xdmcp]Enable=true - Reboot (it didn’t work just restarting
gdm) - run
ps aux | grep Xto find where the Xauthority file was for the login screen (mine was in/run/user/[some UID]/gdm/Xauthority) - Start a X11VNC server on that X session:
1sudo x11vnc -loop -forever -shared -display :0 -auth /run/user/125/gdm/Xauthority --rfbauth /home/nick/vnc-passwd -bg -nowireframe -ncache 10 - Connect from the client (I used reminna to VNC connect to ip:0
- It was just a black screen at first with a cursor. I got around this by literally turning on the TV that was plugged into the server. I guess X just shut down automatically since the screen was off. I had to physically move the mouse on the local server before it came up
The remote login screen! Hooray Once I logged in, it went black again. I checked the
ps auxagain and realized that there was a newXorgsession under my main user account. I VNC’d into that one onip:1instead ofip:0(after allowing access in the GNOME “Sharing” settings) and I was in! I probably could have started another x11vnc server after comandeering the Xorg authority file for that session as well.

Note that none of this is secure and VNC sends everything over the LAN unencrypted so if any nefarious characters are on your Wifi you should not use this (at least without using SSH tunneling of the VNC stuff).
On second thought, if I just wanted to run blender, I could configure the vnc server to start a gnome-session (or something more lightweight) on a Xorg instance when it starts up. The only disadvantage of that is that it won’t control the actual TV for media server use.
Anyway none of this is ideal yet but I’m making progress. If you know of better or cleaner ways, please let me know!!
Next steps
There’s a lot to do still, including setting up the Machine Learning libraries, getting Samba going, configuring Kodi for the media server, tweaking power settings, etc. I’ll keep in touch if anything neat happens.
Hello from a follower of your blog. Whilst what you post was fascinating, well it does not matter what great hardware you build. Unless it is running either a QNAP or Synology OS you will always be in the /dark ages/.
I went thru the loop of hand building my own NAS, but years later revert to QNAP or Synology. So much function from such mediocre hardware. But totally marvellous.
regards mb.
I bought a synology 1815 three years ago after having built many NAS myself. It died after 2.5 years, requiring total replacement.
Also, synology didn’t support NFSv4 (kerberos). You cannot gradually replace parts and build new servers from (partially) old parts.
To recover data without having a replacement is harder than when using plain vanilla freenas/freebsd or linux.
My QNAP (also an 8-drive one) didn’t support NFSv4 either, so it has been downgraded to being an iSCSI storage for my real server (connected via 10gbit).
I will never buy such a NAS anymore, but either build myself again, or just buy a cheap dell server (e.g. a T330 with 8 drives).
Yes the hardware of the (home and SOHO-targeted) NAS is ok, but the software makes them unbearable IMHO.
Currently I’m just running linux on my server and also on an intel NUC with 4 external drives connected through 40gbit Thunderbolt-3 enclosure, with ZFS raidz.
Great article! This year I built my own NAS box for ZFS’ ability to repair bit rot, which was running on FREENAS. I also use FREENAS to host virtual machines, which run my docker containers.
Thank you for this 🙂