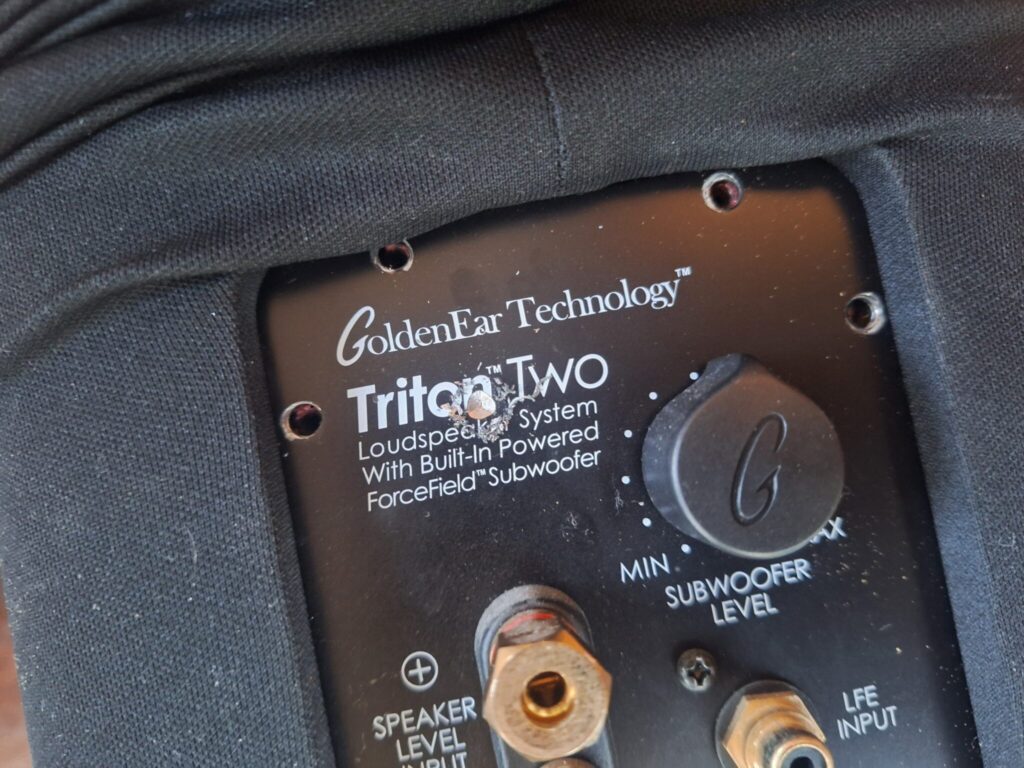
I have a pair of GoldenEar Triton 2 tower speakers that are truly awesome. For years, they have played well and received excellent support when needed from the company. However, recently the company ownership changed and the service situation has shifted. The speakers have integrated powered subwoofer amplifiers in them which seem to go out somewhat regularly. A few years ago, one of mine started making an awful high-pitch tone and died. I emailed support and they walked me through getting and installing a replacement. It worked fine for a while, but soon it died too. I ran with just one woofer for a while but then it started getting crackly when powered. I emailed support again and they said that they have run out of spare units and they also no longer perform repairs due to lack of parts. They suggested I take them to a local electronics shop for repairs.
I considered getting a separate powered subwoofer but really liked the look of the Tritons, and it’d be a shame to not use their woofers. I decided to try to just bypass the broken amplifiers, turning the speakers into completely passive speakers, and then getting an external amplifier to power both. I just finished the job and am happy to report that I have excellent booming bass and can fully enjoy my Tritons yet again.
Choosing an external amp
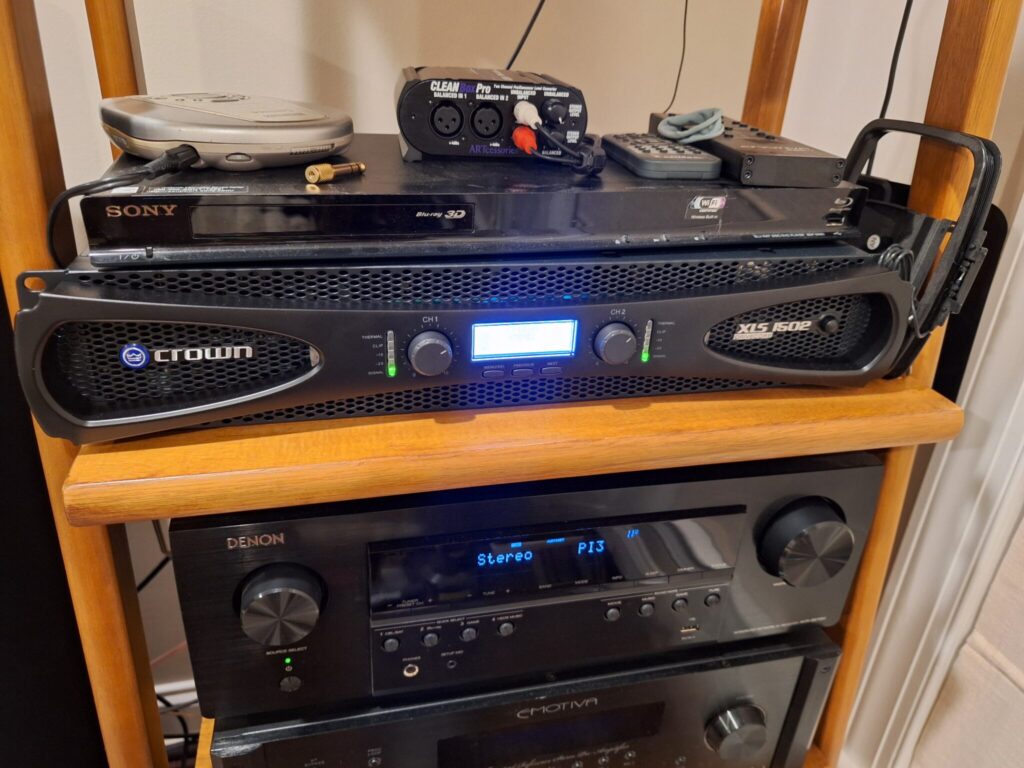
I ended up going with the Crown XLS1502 2-Channel Class D amp. It has enough power for my typical listening levels. When I first hooked it up, I wasn’t able to get the signal above the first level indicator from my Denon’s subwoofer pre-amp outputs, so I purchased an ART CLEANBox Pro Dual Channel Level Converter and some XLR cables. I set the amp to stereo mode and configured a low-pass filter on each channel at 140 Hz (a somewhat arbitrary choice, I may play around to see what sounds better).
Bypassing the internal amplifiers
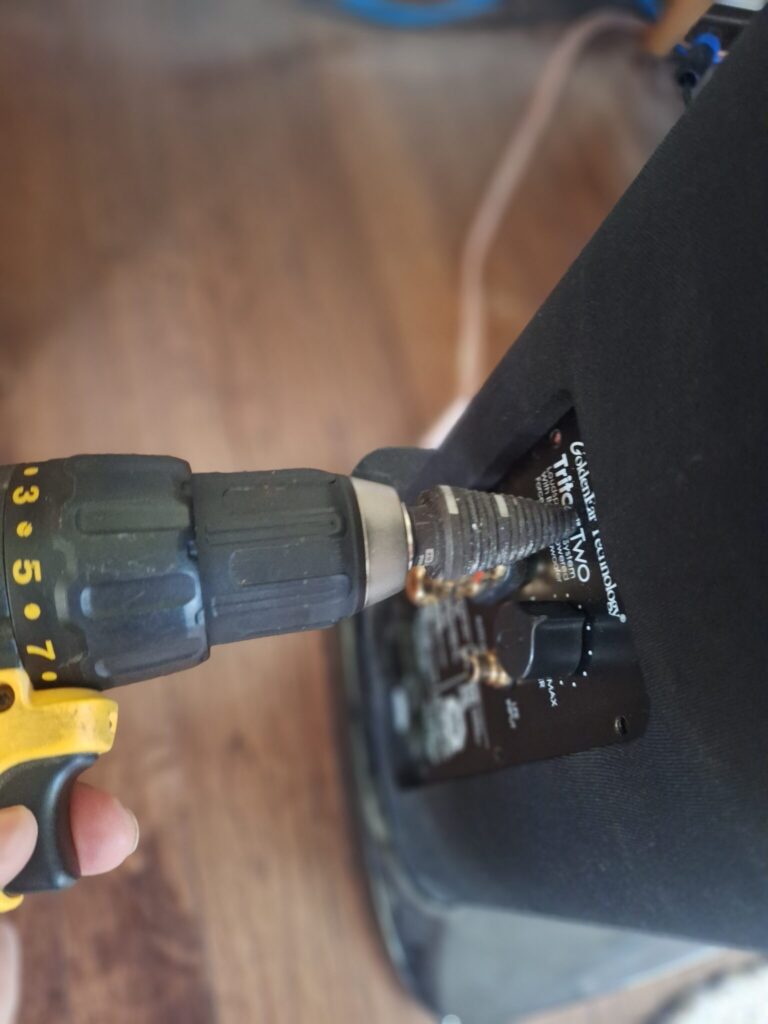
After pulling the fabric down, I opened up both panels of each speaker. I had to cut a hole in the exposed plate and figured this location was best; it nicely fits the female Speakon panel sockets I got. I could have used regular binding posts.
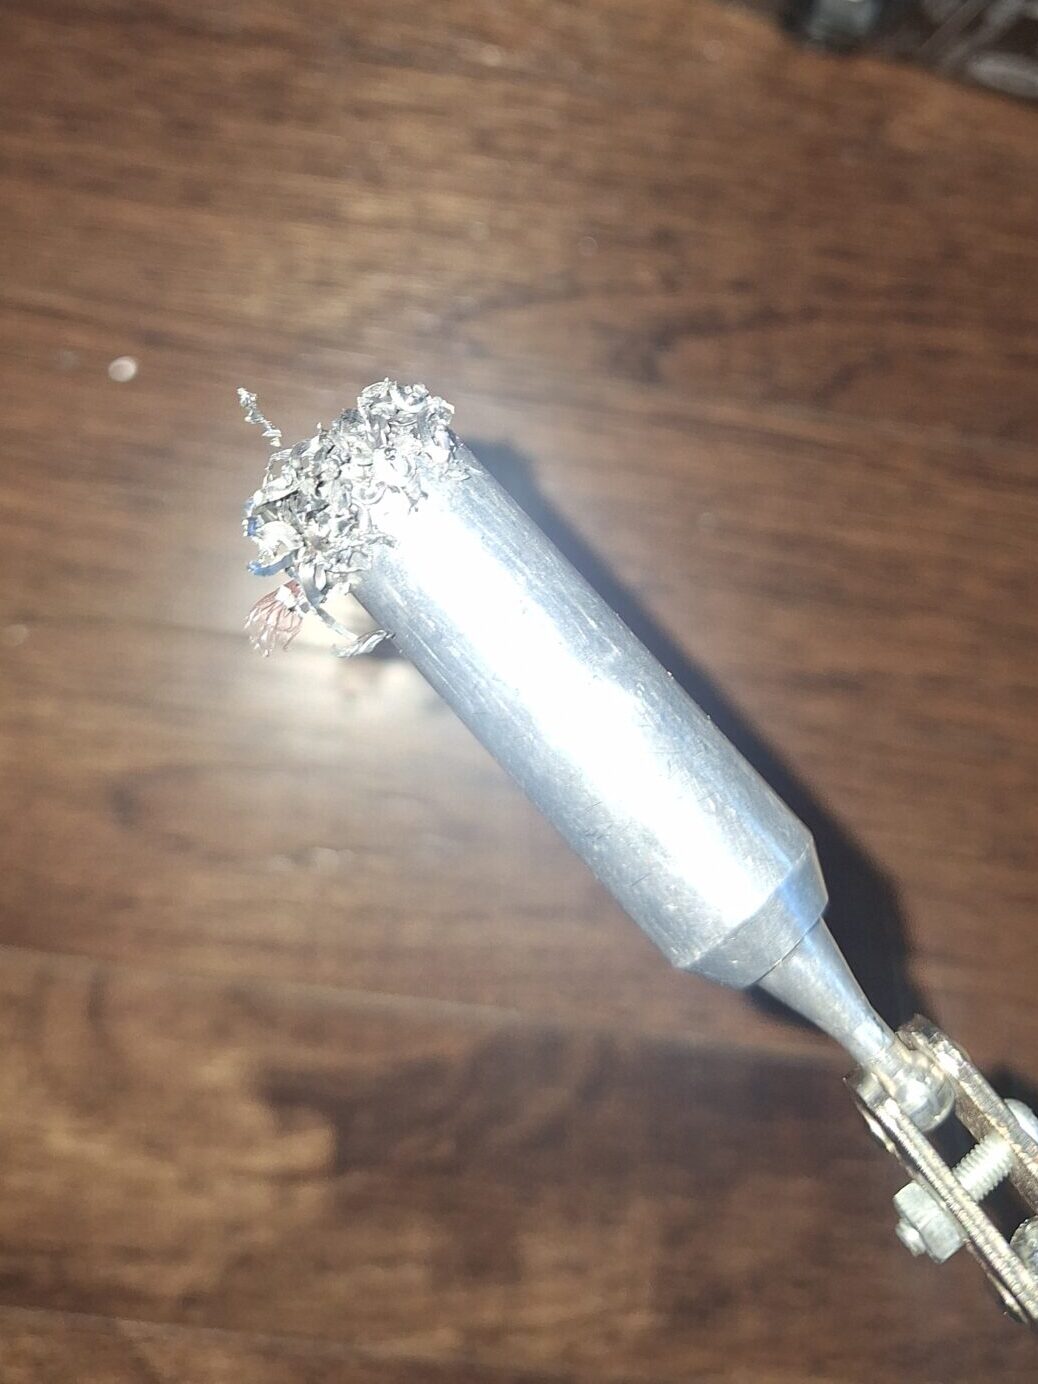
I used this amazing hole cutting bit to cut the hole, checking against my sockets until it fit.
There is a downside to this method, which is that lots of metal shavings end up inside the speaker. I did most of the drilling with the speaker set down so I could push straight down. When I lifted it back up I could use a strong magnet to easily get all the shavings out.
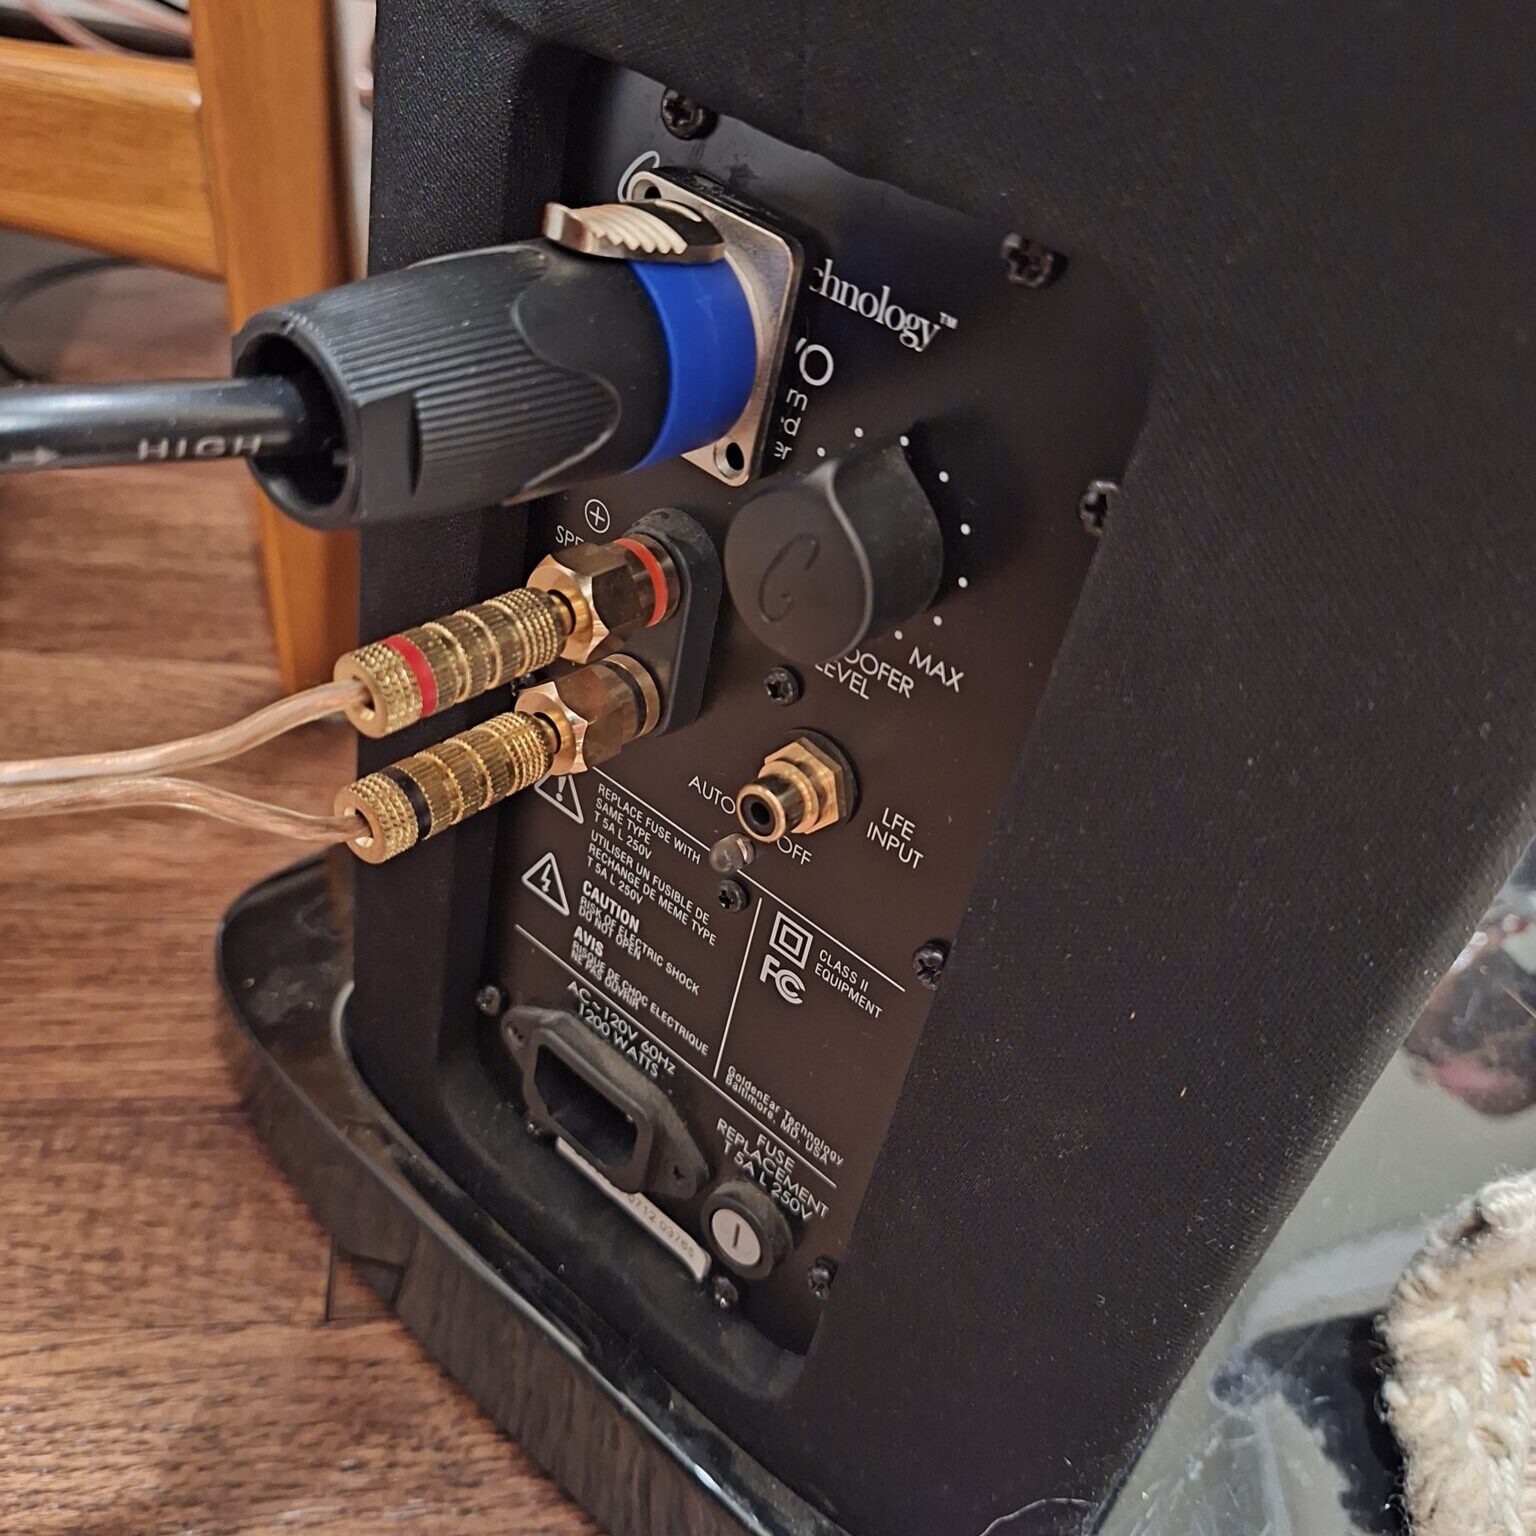
Once the hole was cut, I pulled out the actual amp from the other panel and located the wires that go to the subwoofers. Here they are:
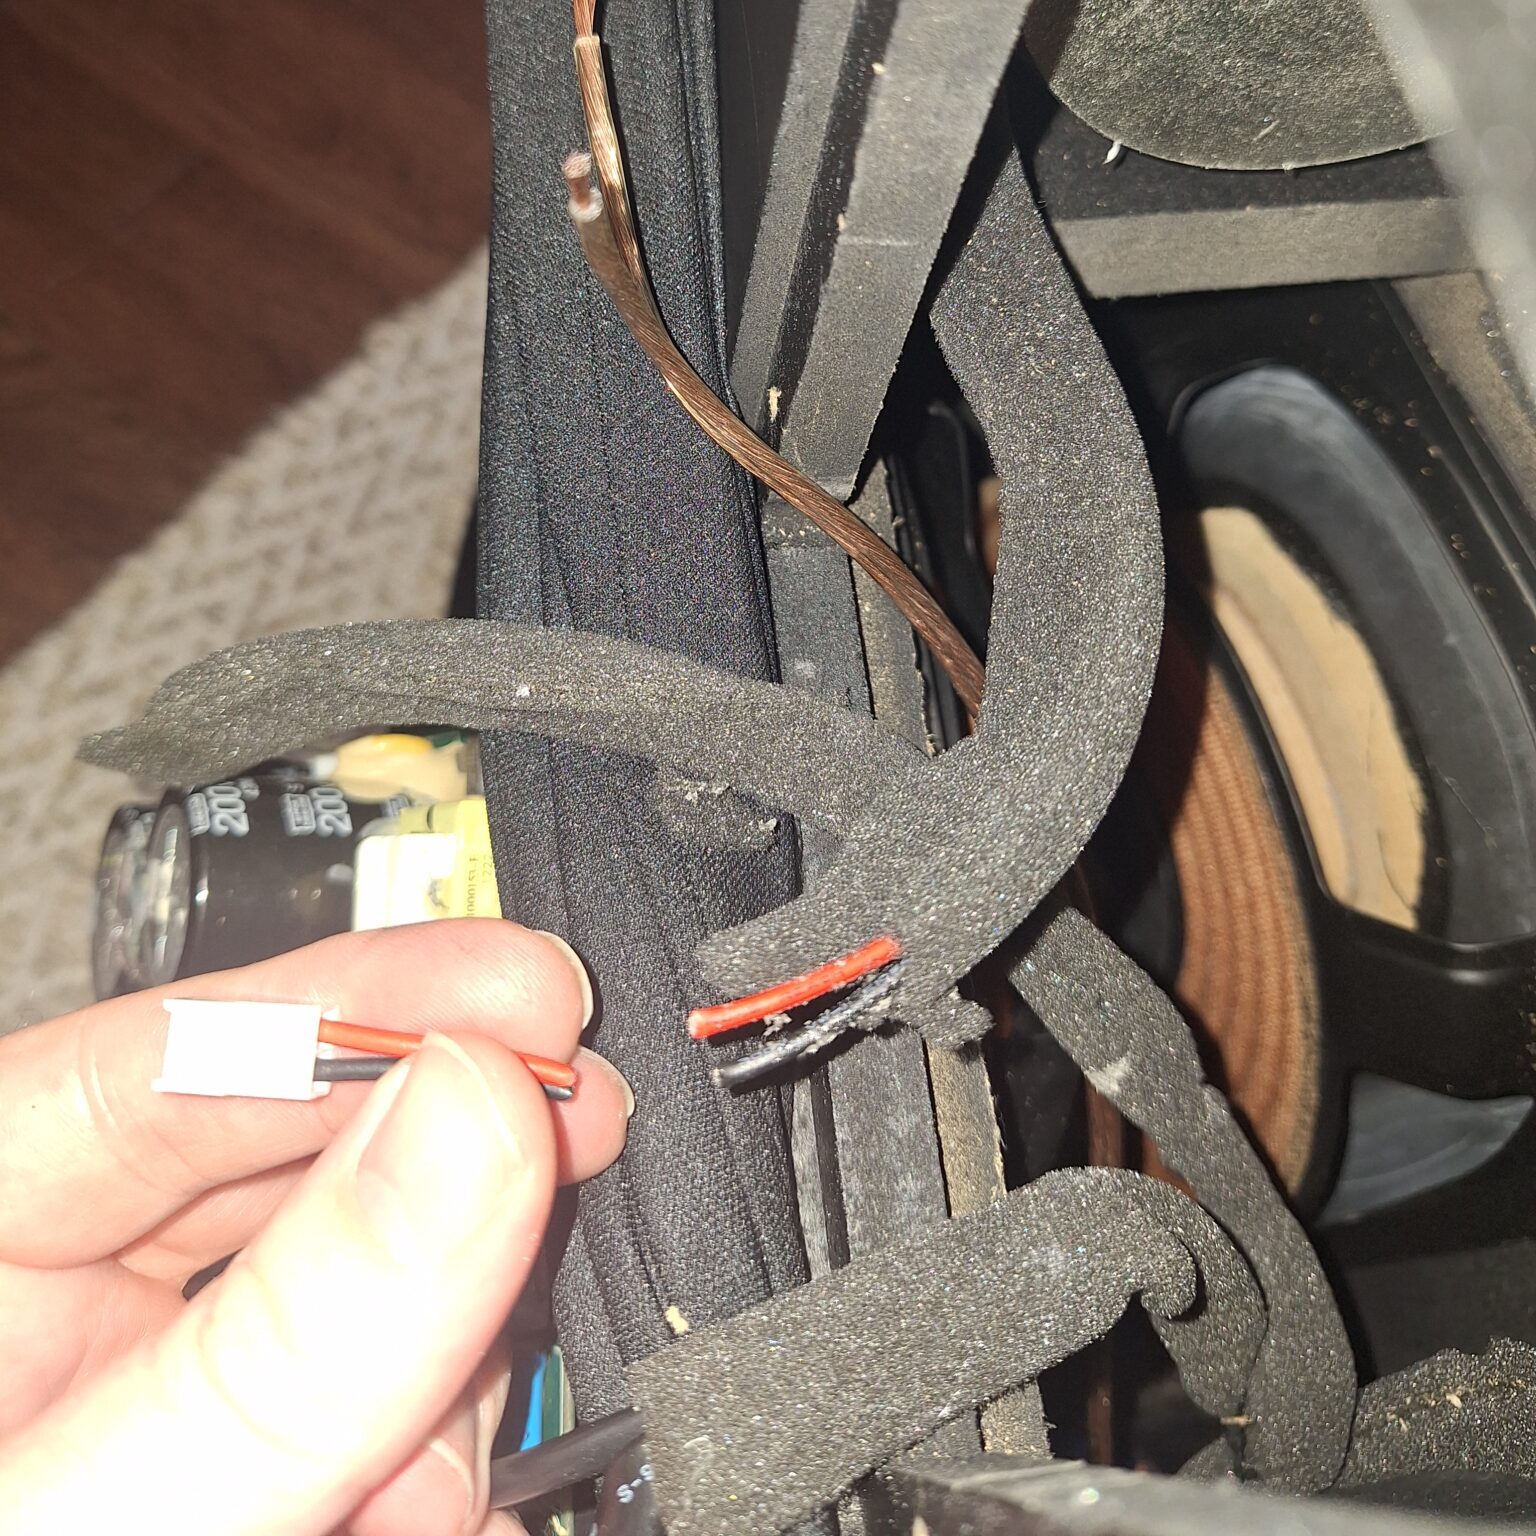
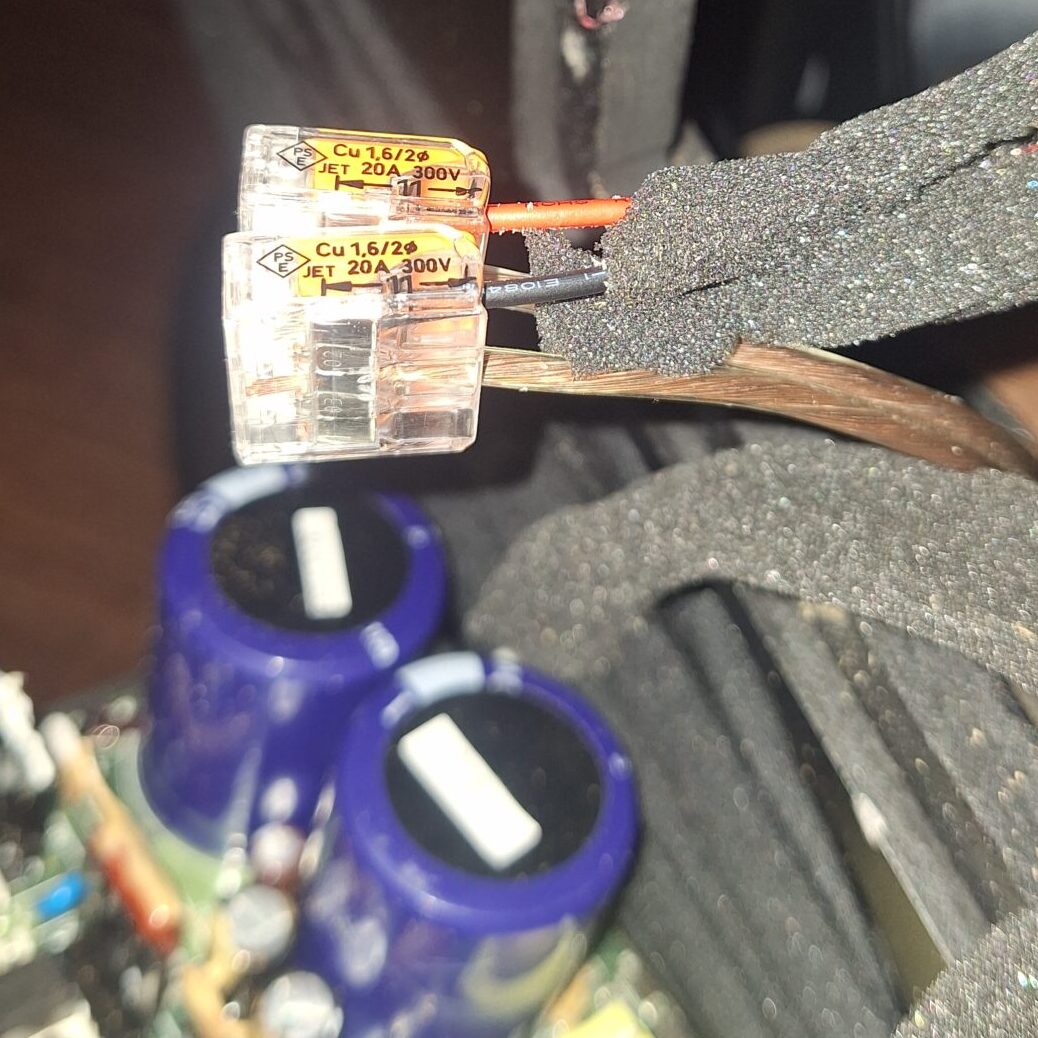
I added a little length of wire, stripped the ends, and connected it with Wago connectors. I used electrical tape to tape them together to avoid vibrations.
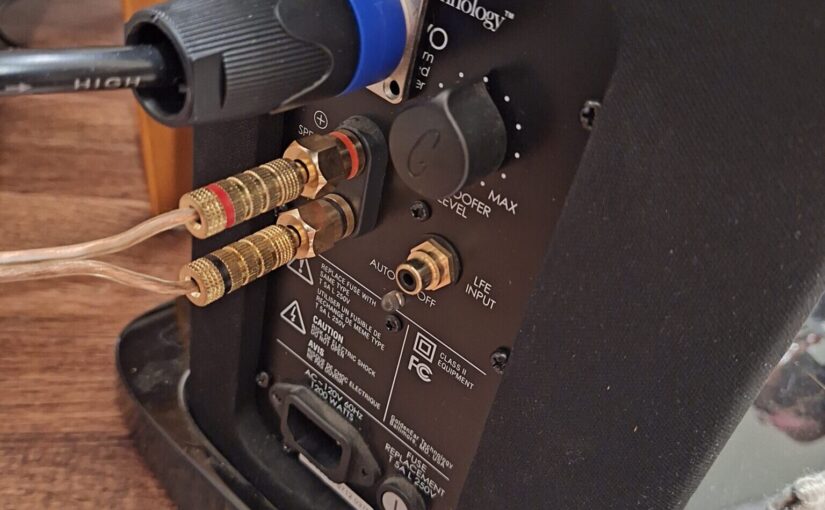
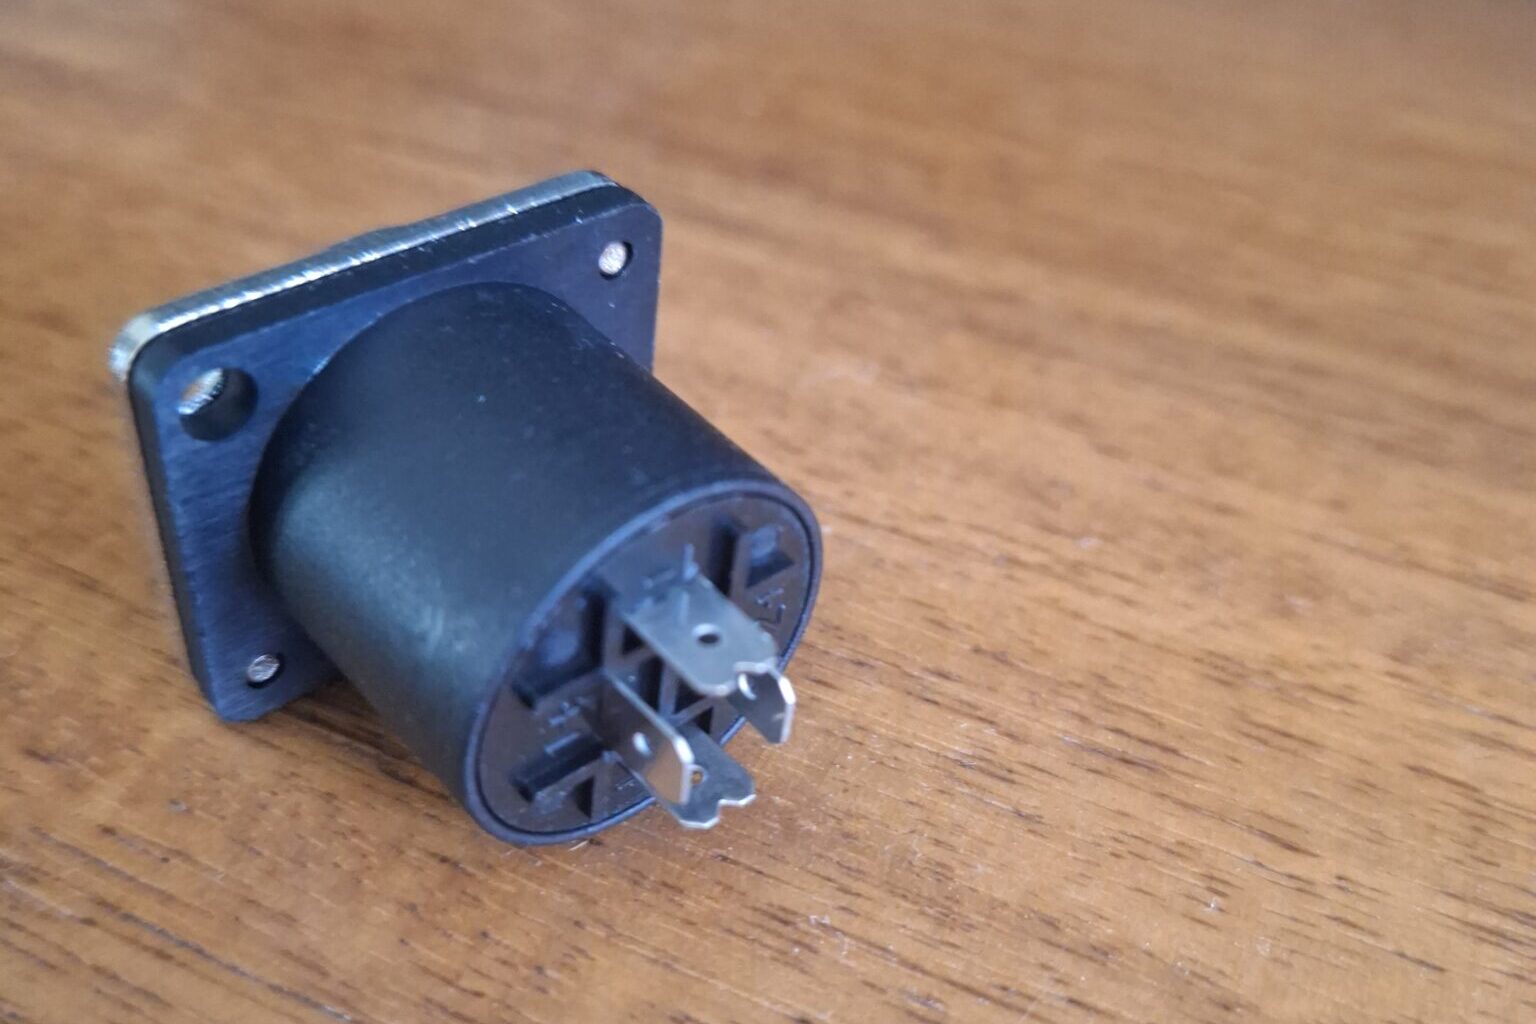
The other end of that short wire in the speaker gets soldered to the back of this speakon panel connector. I soldered the red one to 1+ and the black one to 1-.
I just glued the panel connector into the hole I drilled. Here’s how it looks in the end:
We’re back in business now! I left all the other connections in place internally, assuming they have some passive crossover circuits in there somewhere. I knew this would mostly work because the speakers always sounded great minus no bass when they were operated without external power plugged in.
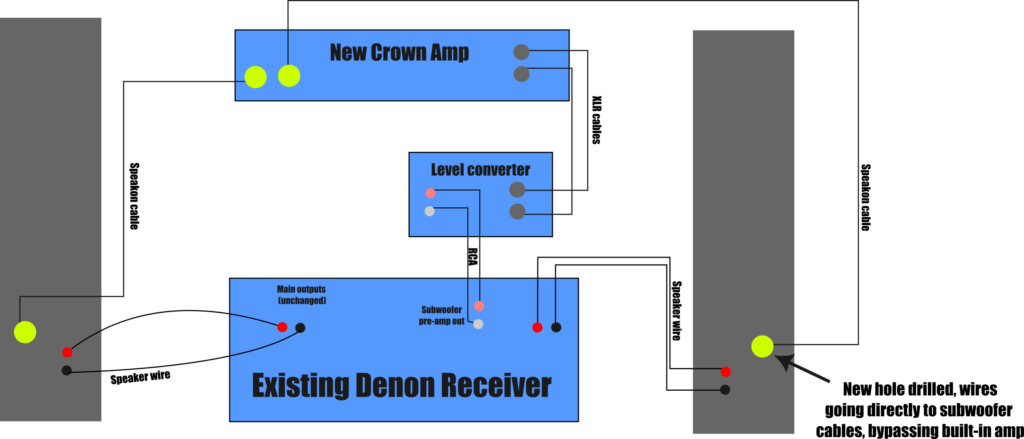
Here’s the final wiring route:
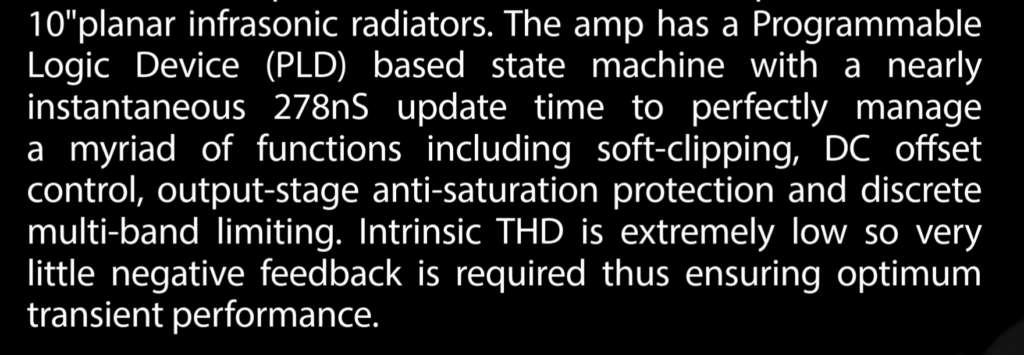
The original amp had fancier DSP for sure, as stated in the pamphlet, so we are losing this in exchange for a static low-pass filter, but it still sounds pretty good, and certainly better than with broken amps.
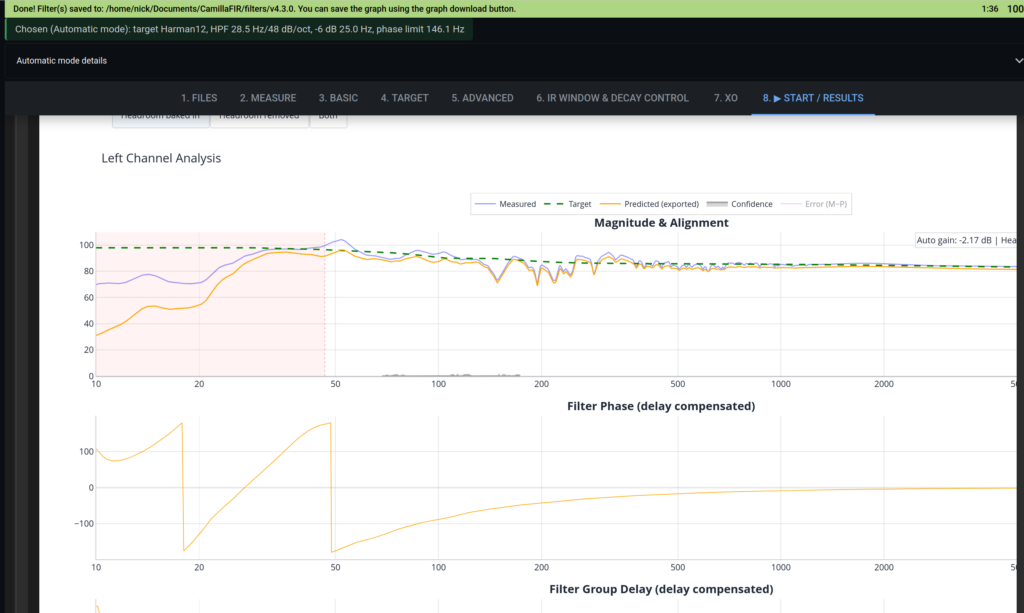
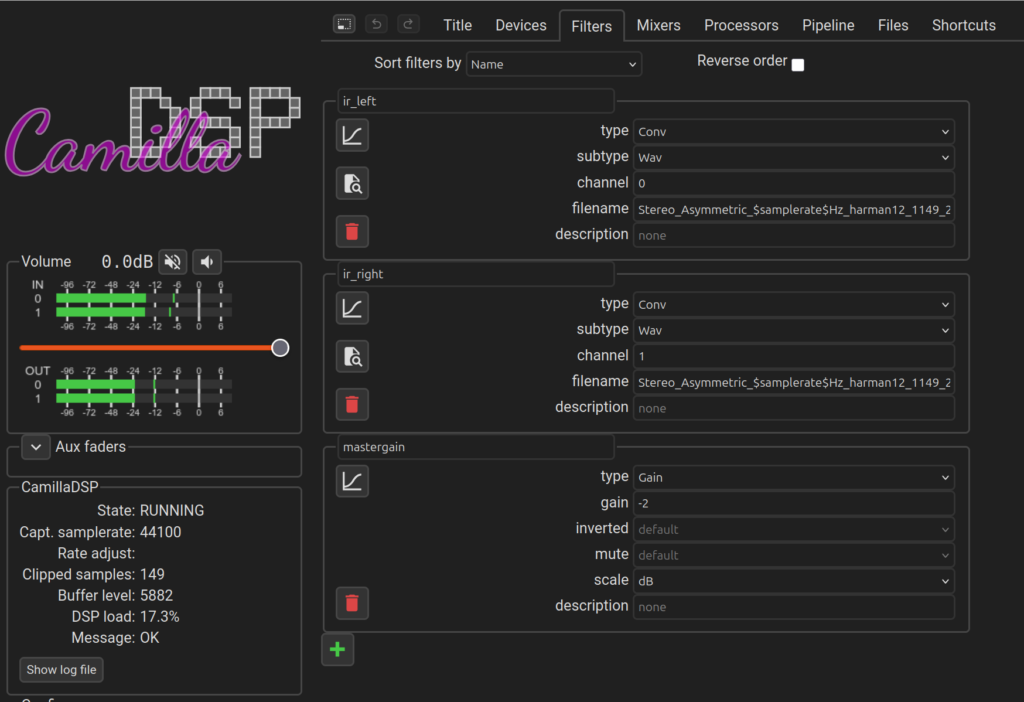
UPDATE: While worrying about the reduced DSP quality, I decided to do some calibrated room measurements and apply extra-fancy DSP with REW, CamillaFIR, and CamillaDSP running on the Raspberry Pi 3B that I have bringing audio into this system. Things sound BETTER THAN EVER! This step does make a notable difference in the bass clarity over just the LPF. Skipping this step isn’t that bad, you’ll just turn down the bass a bit more and it still sounds good.
I hope this helps other GoldenEar enthusiasts now that so many of us are experiencing amp failure with no other option.
It would be helpful to see how the connections of the wago go to the speakon.
Big like for the idea.
Thanks! I added another photo and some more explanation of the connections.